

Quick Overview
Cascade Kingdom contains 50 purple regional coins arranged here as 16 practical clusters. Finish the kingdom story and return before doing a full sweep so every route, checkpoint and bonus-room cluster is available.
Odyssey Landing Area Purple Coins
Start here before climbing toward the waterfall. These first three clusters are all close to the opening route and are easy to miss if you run straight toward the Chain Chomps.
 Screenshot: Gameranx / Nintendo
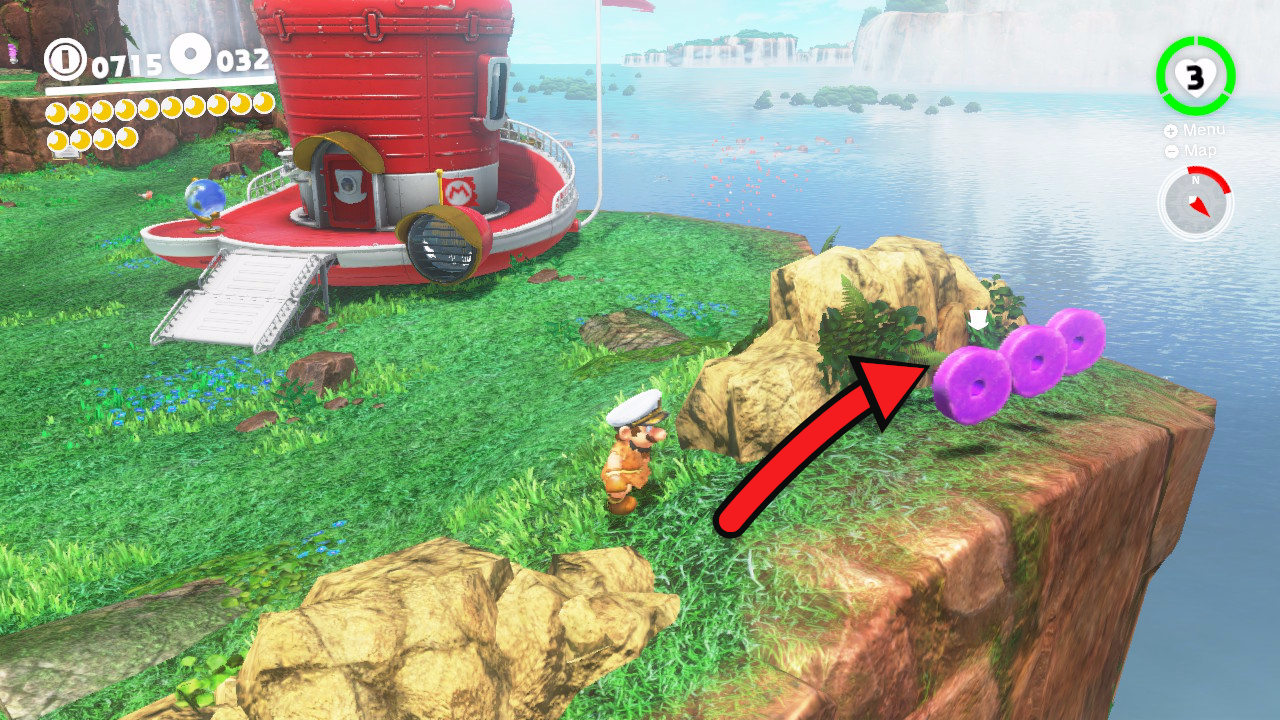
Purple Coins #1-3 – Behind the Odyssey Rocks
- Start at the Odyssey landing point and turn around before following the main path.
- Walk to the low rock wall beside the outer cliff edge.
- Collect the three stone-wheel coins tucked behind the rocks.
 Screenshot: Gameranx / Nintendo
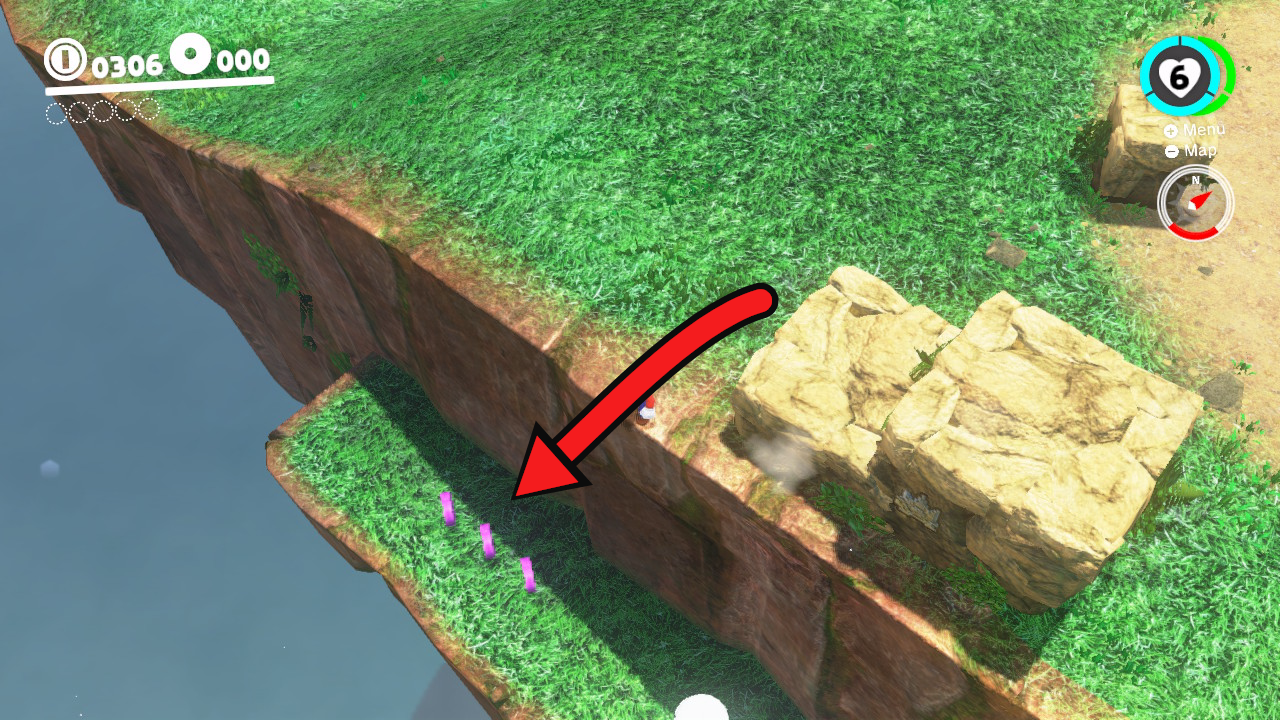
Purple Coins #4-6 – First Chain Chomp Cliffside
- Start from the Waterfall Basin checkpoint and face the first Chain Chomp area.
- Move to the outside edge beside the breakable rocks and look down.
- Drop to the narrow lower ledge and collect all three coins.
 Screenshot: Gameranx / Nintendo
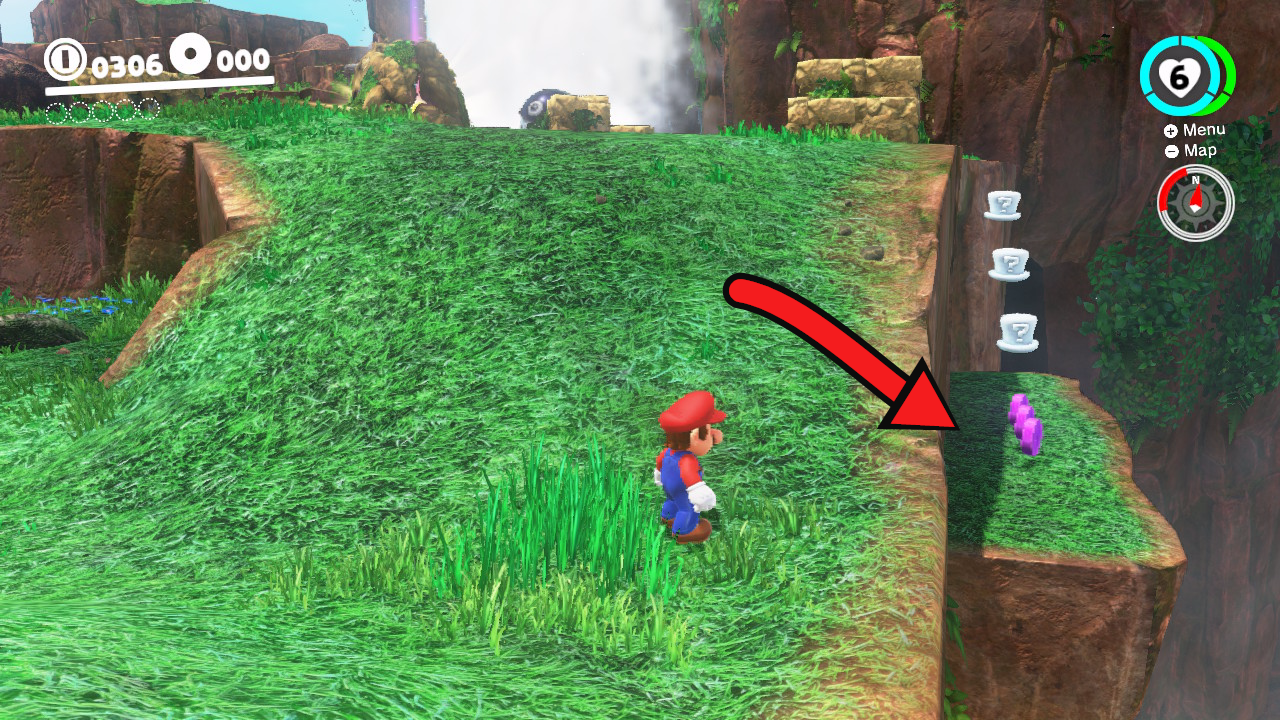
Purple Coins #7-9 – Homing Throw Sign Ledge
- From Waterfall Basin, find the tutorial sign for homing throws.
- Check the waterfall-side cliff just left of the sign.
- Drop to the small ledge, grab the three coins and use the hat platforms to return.
Waterfall Basin Purple Coins
The basin hides coins behind and below the main waterfall route. Clear these before using the bridge route upward.
 Screenshot: Gameranx / Nintendo
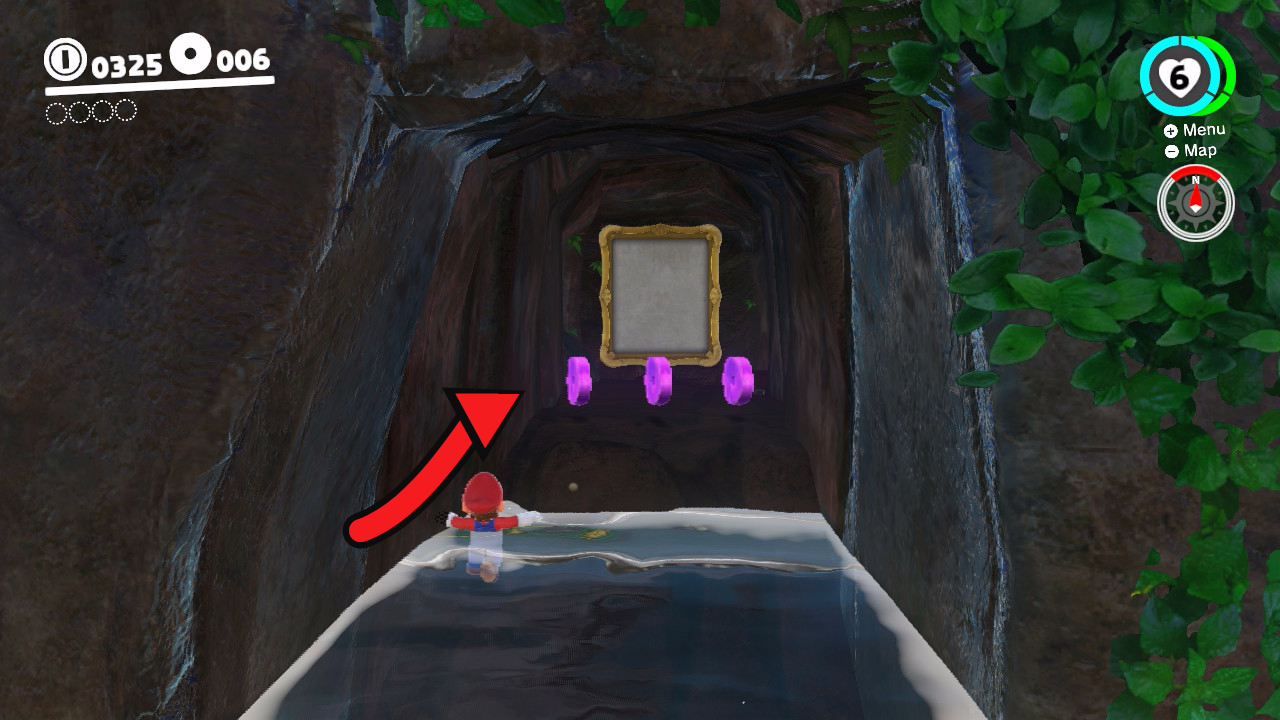
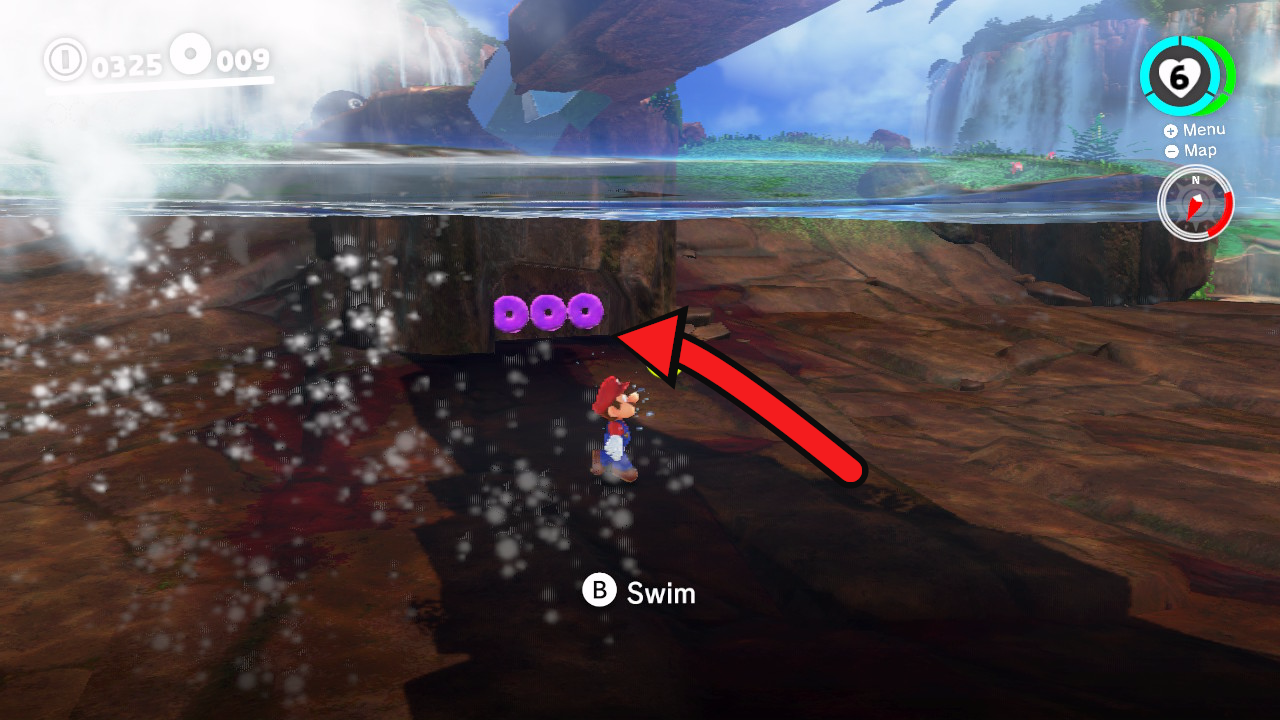
Purple Coins #10-12 – Behind the Waterfall
- Start in Waterfall Basin and enter the water below the main waterfall.
- Swim through the falling water into the hidden cave with the painting.
- Collect the three coins lined up inside the cave.
 Screenshot: Gameranx / Nintendo
Purple Coins #13-15 – Under the First Bridge
- Return to Waterfall Basin after the first stone bridge has appeared.
- Dive into the water and swim underneath the bridge beside the waterfall.
- Collect the three submerged coins against the rock wall.
Top of the Big Stump Purple Coins
This is the densest cleanup section. Use the Top of the Big Stump and Stone Bridge flags to sweep the high ledges, rocky columns and T-Rex area.
 Screenshot: Gameranx / Nintendo
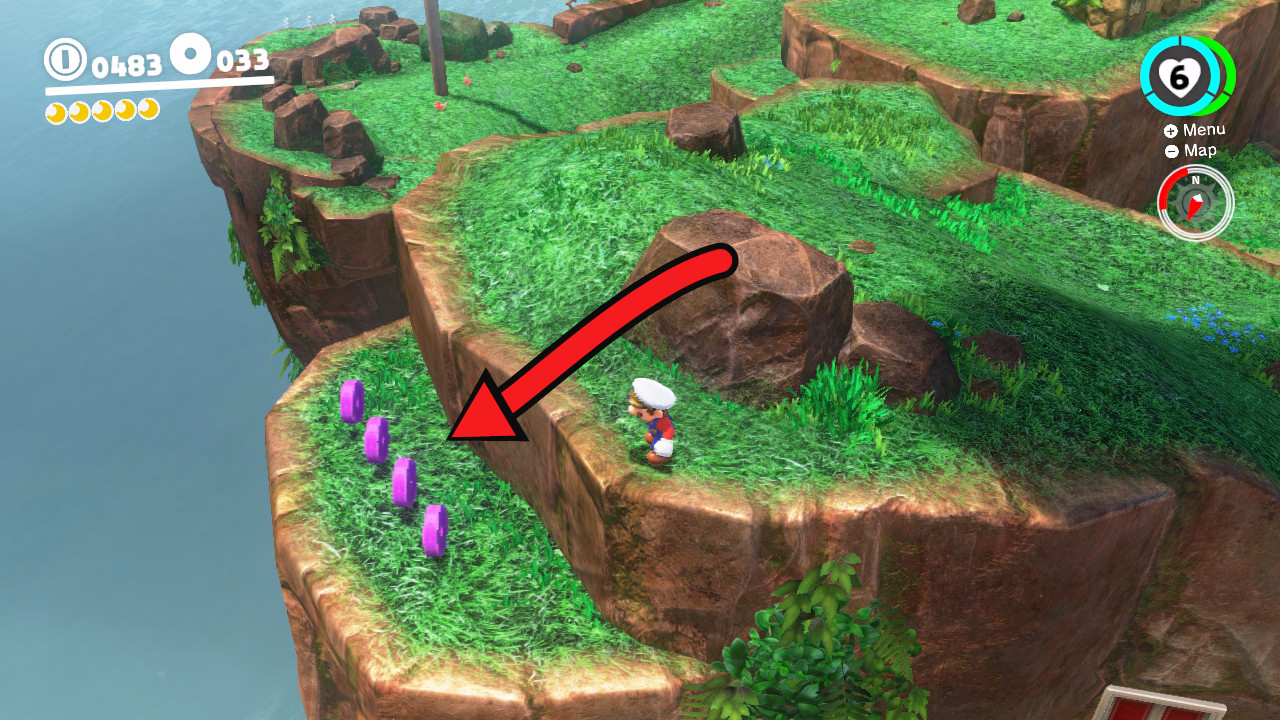
Purple Coins #16-19 – Lower High-Cliff Ledge
- Warp to Top of the Big Stump after opening the route with a Chain Chomp.
- Walk to the outer edge and look for the lower grassy shelf below the high cliff.
- Drop carefully onto the shelf and collect the four coins before climbing back.
 Screenshot: Gameranx / Nintendo
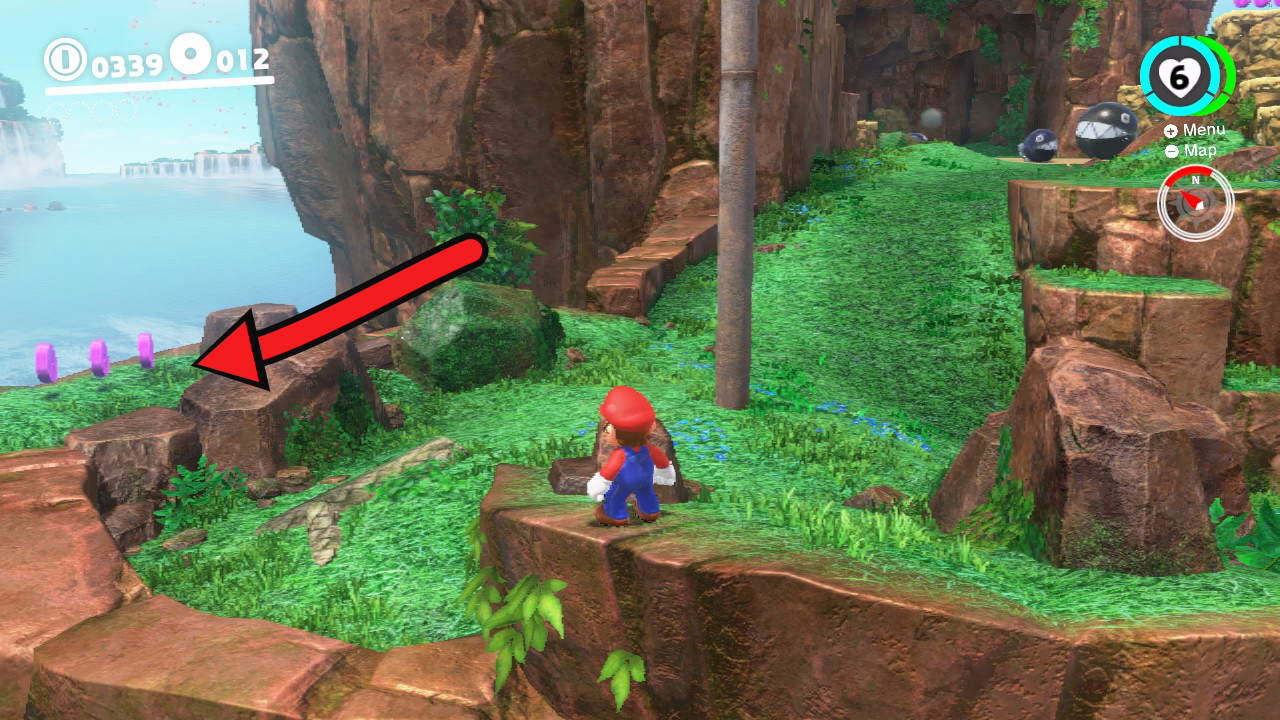
Purple Coins #20-22 – Tall Pole Ledge
- Follow the path from Top of the Big Stump toward the second Chain Chomp field.
- Stop at the tall metal pole and check the lower ledge on its left side.
- Step down to the ledge and collect the three coins.
 Screenshot: Gameranx / Nintendo
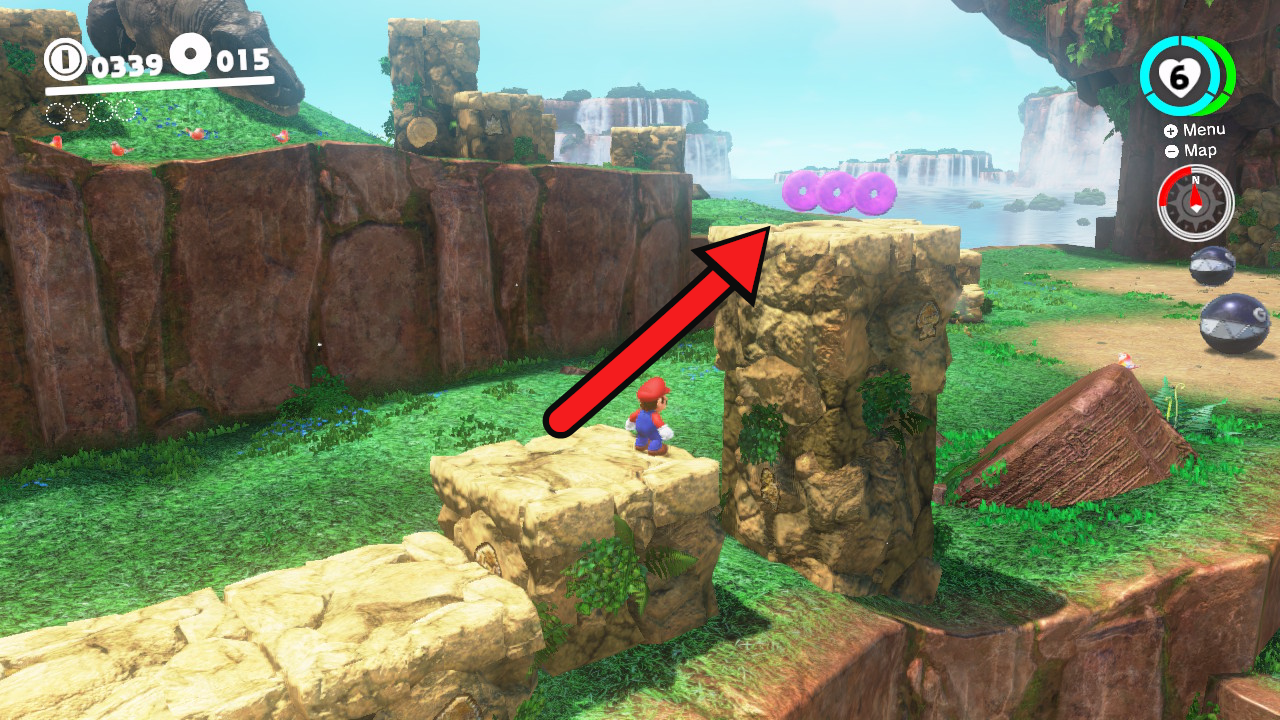
Purple Coins #23-25 – Rocky Column by the Chain Chomps
- Enter the second Chain Chomp field and locate the tall breakable fossil column.
- Climb the nearby rocks before clearing the area with the T-Rex.
- Jump onto the column and collect the three coins on top.
 Screenshot: Gameranx / Nintendo
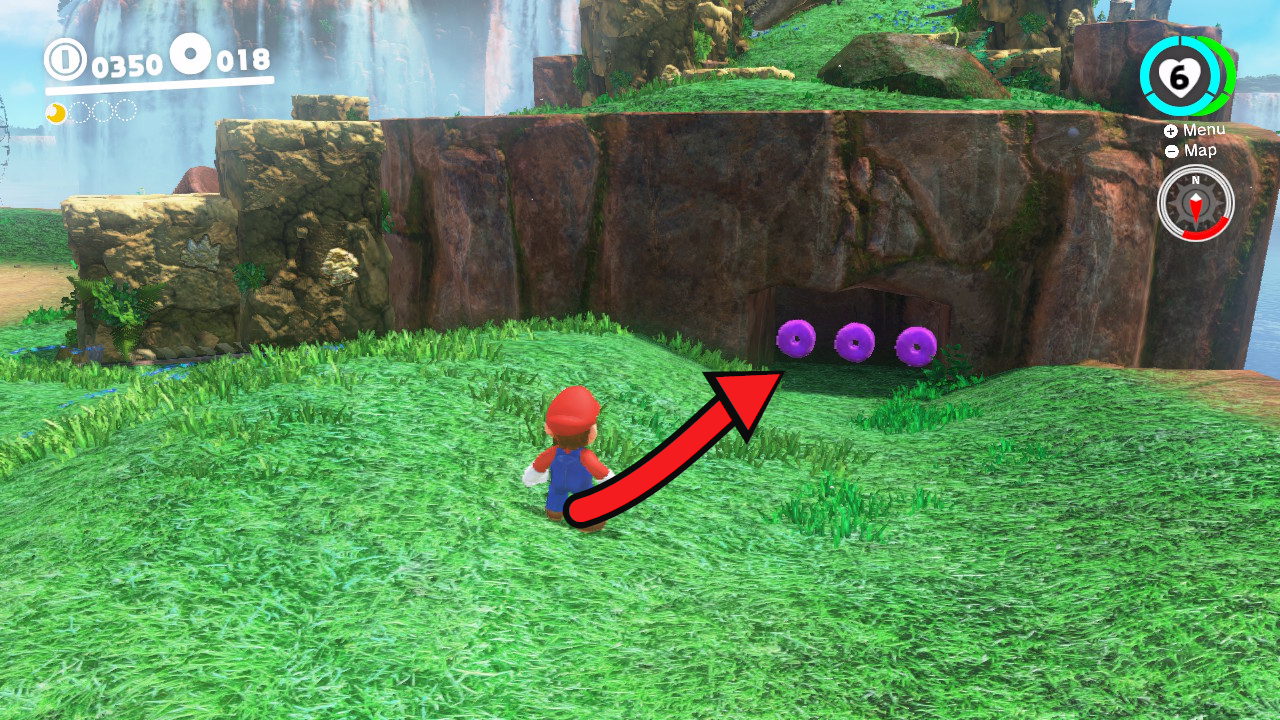
Purple Coins #26-28 – T-Rex Side Alcove
- Go to the raised ground below the sleeping T-Rex.
- Check the dark recess at the base of the rock wall instead of climbing immediately.
- Walk into the alcove and collect the three coins.
 Screenshot: Gameranx / Nintendo
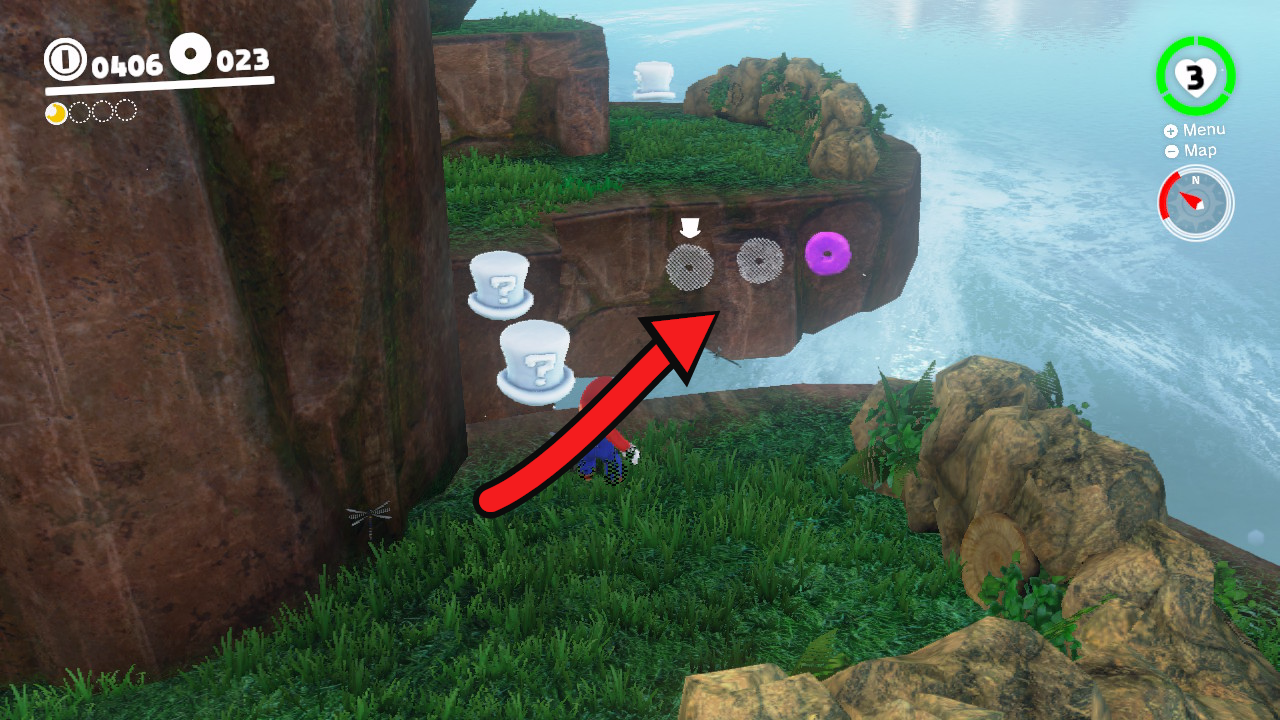
Purple Coins #29-31 – Cappy Cloud Platforms
- From the Stone Bridge checkpoint, follow the path back toward the Chain Chomp field.
- Throw Cappy at the two white hat clouds beside the gap.
- Cross the temporary platforms or throw Cappy through the three floating coins.
Stone Bridge and 8-Bit Route Purple Coins
These coins sit around the Stone Bridge flag, the first 8-bit pipe route and the nearby Cappy Door room. Move slowly here because several groups are above, below or behind the obvious path.
 Screenshot: Gameranx / Nintendo
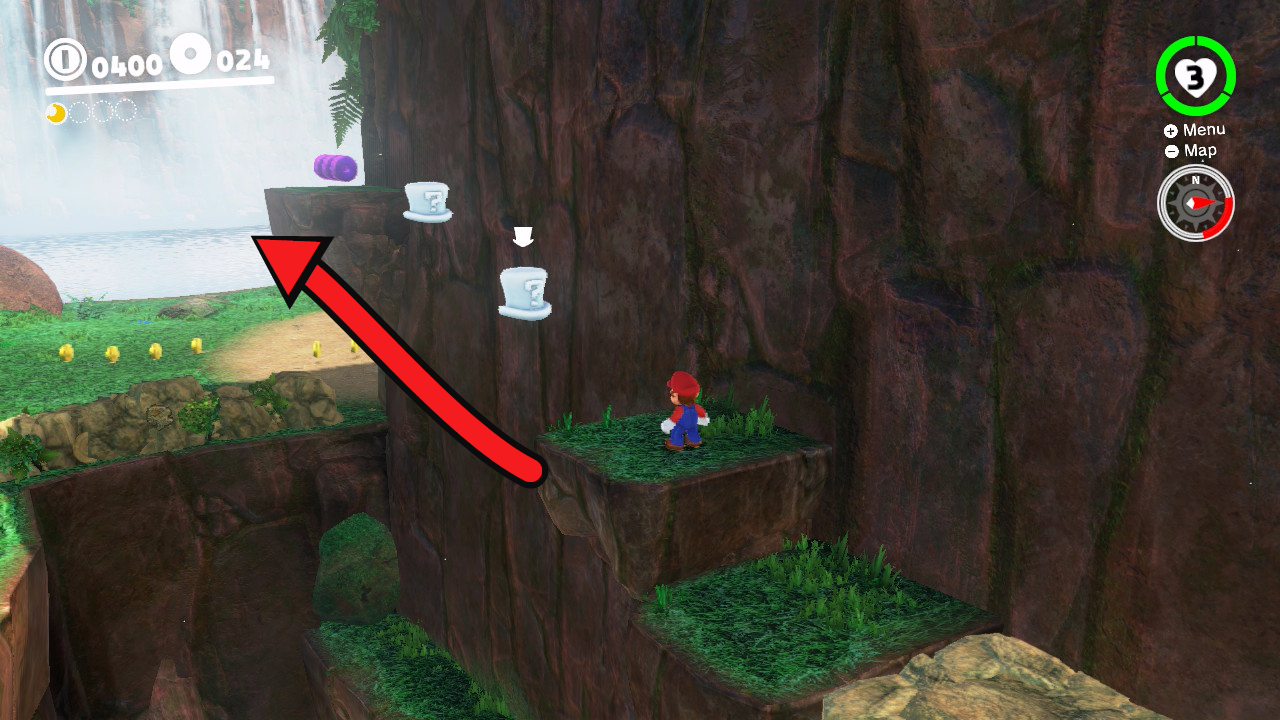
Purple Coins #32-34 – Right of Stone Bridge
- Stand at the Stone Bridge checkpoint and face the bridge.
- Turn right and activate the white hat platforms along the cliff wall.
- Climb across to the upper ledge and collect the three coins.
 Screenshot: Gameranx / Nintendo
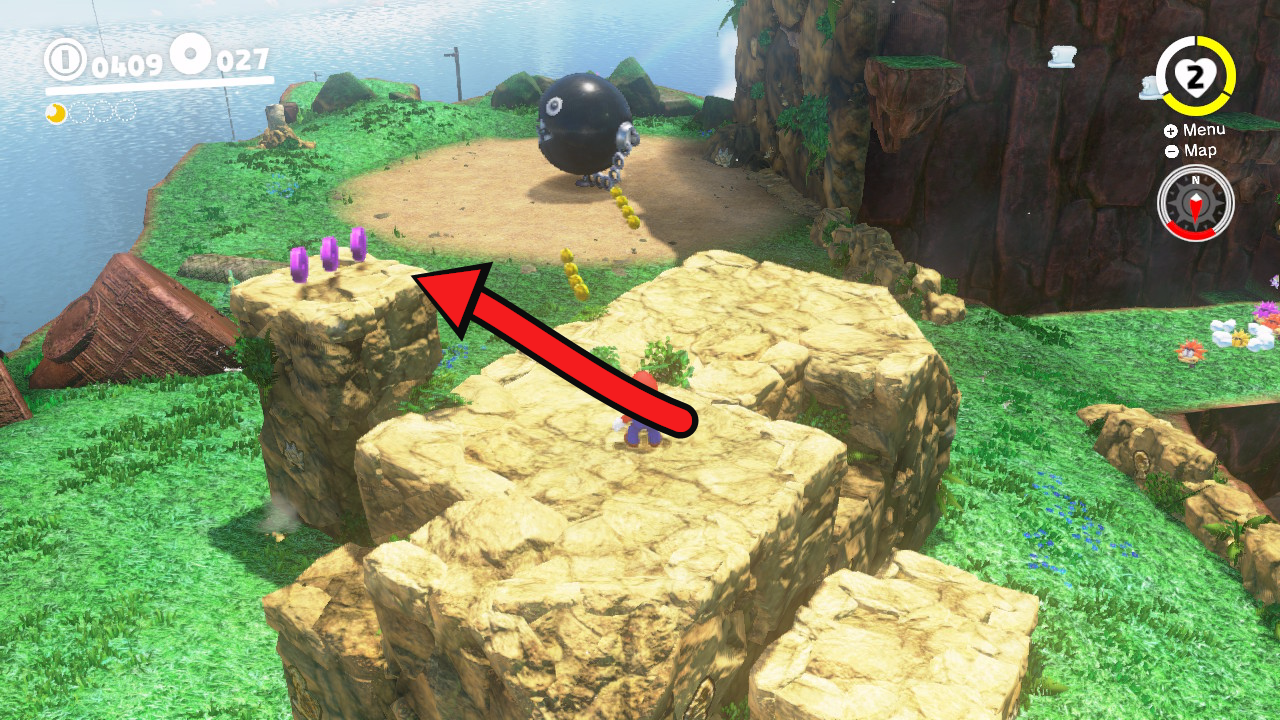
Purple Coins #35-37 – Breakable Rocks Before the Chain Chomp
- Cross Stone Bridge and follow the path toward the next Chain Chomp.
- Climb the large fossil blocks before breaking them.
- Collect the three coins on the small raised block at the edge.
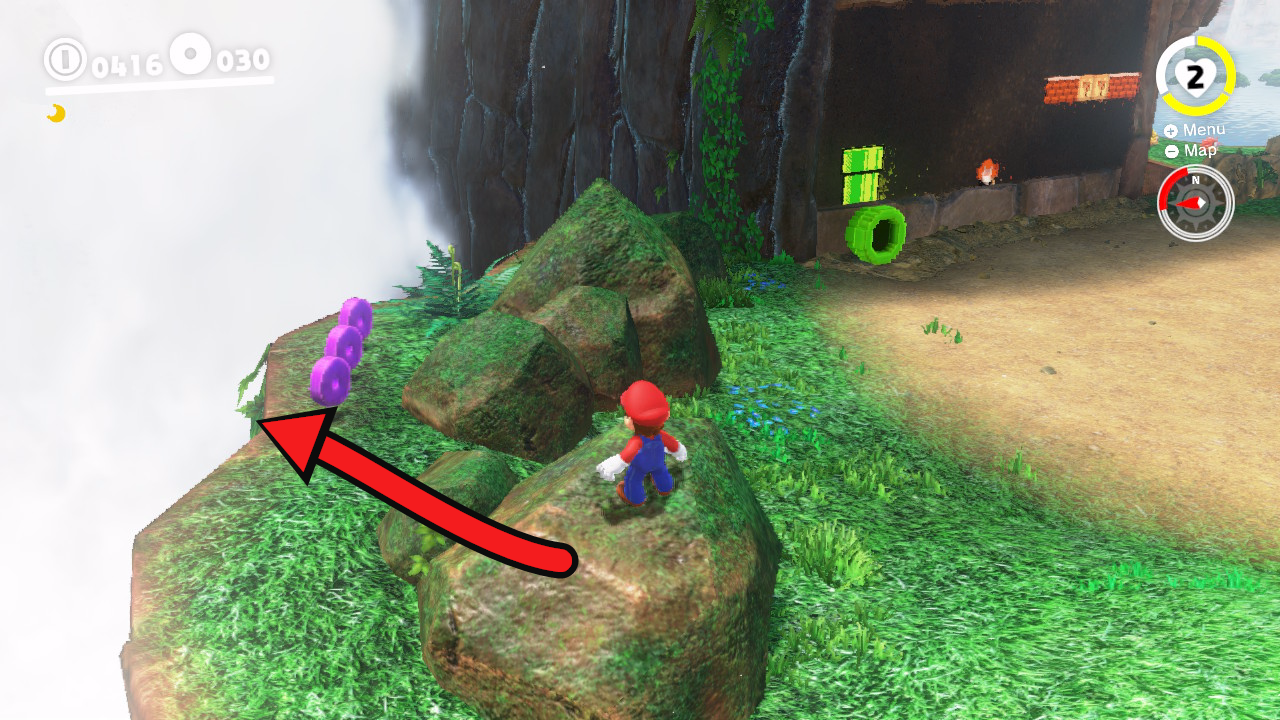 Screenshot: Gameranx / Nintendo
Purple Coins #38-40 – Left of the 2D Pipe
- Reach the green Warp Pipe leading into the main 2D wall section.
- Before entering, walk left around the mossy rocks beside the waterfall.
- Collect the three coins on the narrow cliff ledge.
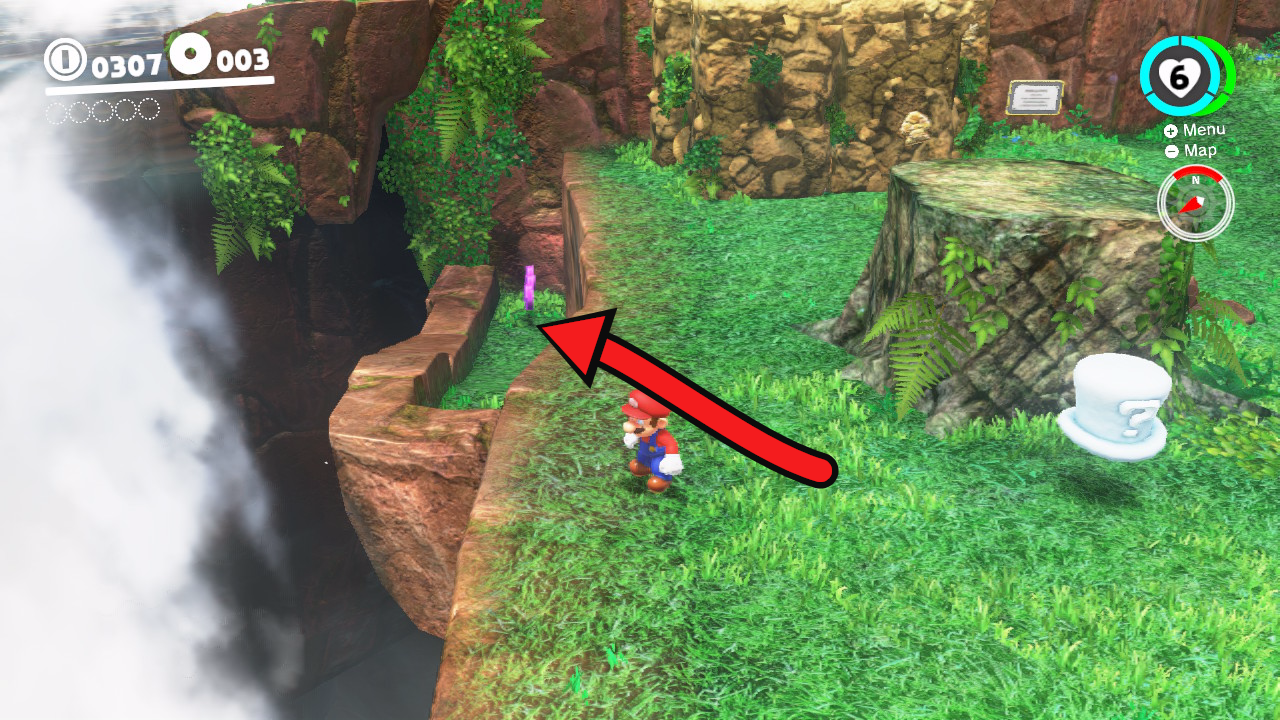 Screenshot: Gameranx / Nintendo
Purple Coins #41-43 – Under-Waterfall Cloud Path
- Return to the first large Chain Chomp area and face the waterfall.
- Follow the lower path behind the falling water and activate the hat clouds with Cappy.
- Cross the temporary platforms and collect the three coins on the far ledge.
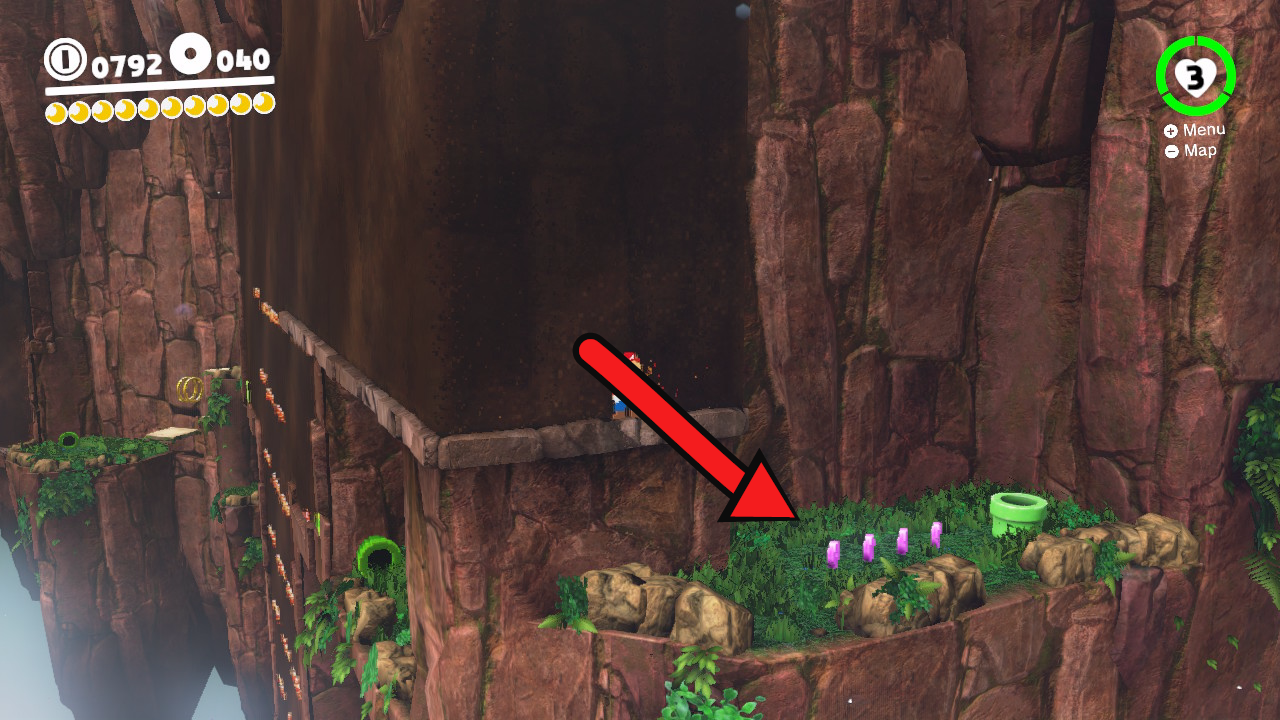 Screenshot: Gameranx / Nintendo
Purple Coins #44-47 – 2D Lift Room Ceiling
- Enter the red Cappy Door below and right of the Stone Bridge checkpoint.
- In the 2D lift room, ride the rising platform above the normal camera view.
- Run across the tops of the descending lifts to reach the hidden ceiling route and four coins.
Fossil Falls Heights Purple Coins
Save this final group for the top route near the Broodal arena. It is quick to grab once you are already cleaning up the upper floating isles.
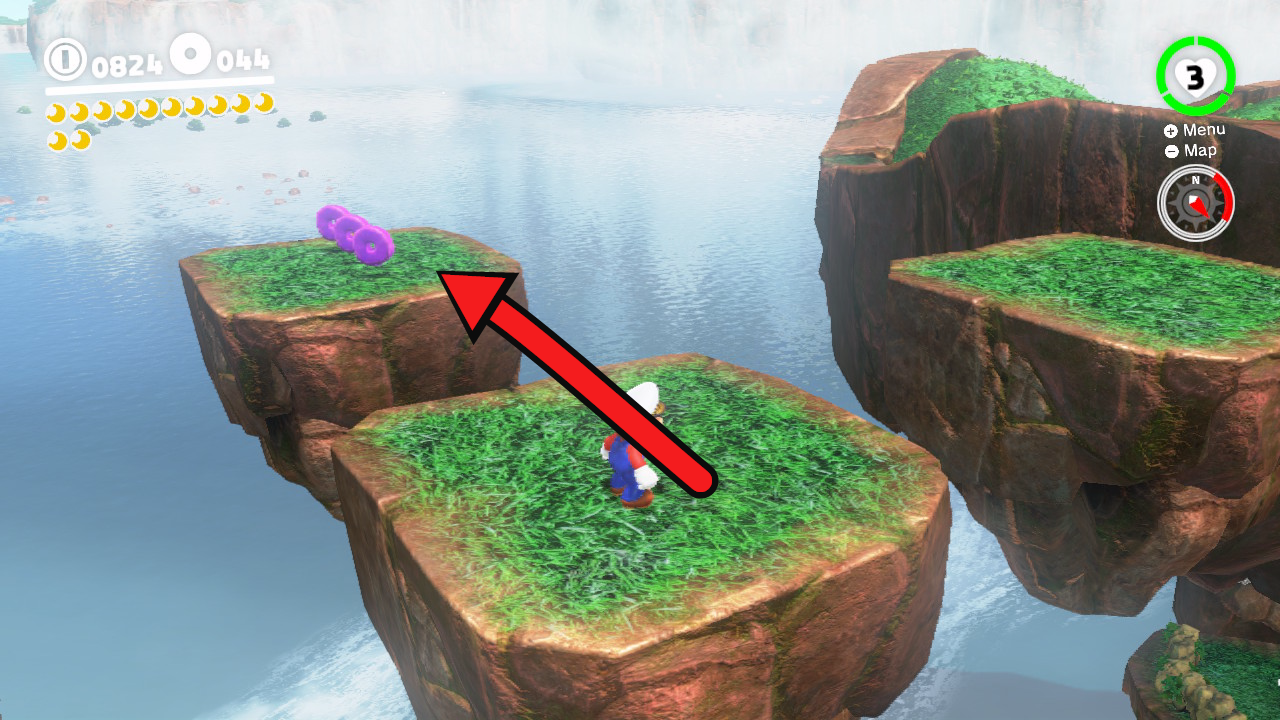 Screenshot: Gameranx / Nintendo
Purple Coins #48-50 – Floating Isles Near the Boss Arena
- Warp to Fossil Falls Heights or climb through the short main 2D section.
- Follow the floating islands outside the former Broodal arena.
- Jump to the small outer island and collect the final three coins.
Image Sources and Credits
Super Mario Odyssey visuals are property of Nintendo. The 16 location screenshots are existing Gameranx gameplay captures used as route references and are credited on every card.
Coin totals, availability and routes were cross-checked against Super Mario Wiki, Gamer Guides and the Gameranx Cascade Kingdom route.
Cascade Kingdom Purple Coin FAQ
How many purple coins are in Cascade Kingdom?
Cascade Kingdom has 50 purple regional coins, shaped like stone wheels. This guide groups them into 16 clusters that add up to all 50.
When are all Cascade Kingdom purple coins available?
Finish Multi Moon Atop the Falls and return to Cascade Kingdom before doing a complete sweep. The return visit opens the later routes and makes every cluster in this guide available.
Which Cascade purple coins are easiest to miss?
The four coins above the 2D lift room, the four on the lower high-cliff ledge and the small cloud-platform ledges are the most common misses because they sit outside the direct story route.
How can I find my last missing Cascade purple coins?
Check the 2D lift room and every lower cliff ledge first, then follow the 16 cards in order. If you own a Bowser amiibo, scanning it can mark regional coin locations on the in-game map, but it is not required.
What can I buy with Cascade Kingdom purple coins?
The purple Crazy Cap counter sells Caveman Headwear (5), the Caveman Outfit (10), the Cascade Kingdom Sticker (5), the T-Rex Model (5) and the Triceratops Trophy (25). The full set costs exactly 50 coins.
Can Cascade Kingdom purple coins be used in another kingdom?
No. Regional coins are kingdom-specific, so Cascade Kingdom coins can only be spent at the purple Crazy Cap counter in Cascade Kingdom.