
Quick Overview
Sweep Bubblaine clockwise from the Odyssey through the southwest shore, Lighthouse, Ocean Trench, Hot Spring Island, Glass Palace and Rolling Canyon.
Want Your YouTube Channel Featured Here?
Do you have a complete, original Seaside Kingdom purple coin walkthrough on your own YouTube channel? Send us your channel or playlist. If the footage is a good fit, we can add credited screenshots to this guide and link viewers back to your channel.
Only submit gameplay and videos that you created and have permission to share.
Odyssey, Beach House, and Southwest Shore
Start at the Odyssey. Work west from the ship toward the Beach House, then follow the outer southwest shoreline before turning north. This section covers Purple Coins #1-3 through #16-18.
Purple Coins #1-3 – On the cliffs next to the Odyssey
- Start: Warp to the Odyssey. Work west from the ship toward the Beach House, then follow the outer southwest shoreline before turning north.
- What you see: The group rests on the cliffs beside the Odyssey
- Route and action: Line Mario up with the complete group and move through all 3 coins; pause long enough to confirm the regional-coin counter increases.
- Common mistake: Collecting only part of the cluster; the counter must rise by 3.
Purple Coins #4-6 – In a pool next to the Beach House
- Start: Warp to the Odyssey. Work west from the ship toward the Beach House, then follow the outer southwest shoreline before turning north.
- What you see: The group sits in a pool beside the Beach House
- Route and action: Adjust Mario's depth until the complete group is level with the camera, then swim through all 3 coins in one pass.
- Common mistake: Swimming at the surface while the group sits deeper, higher or against the bank.
Purple Coins #7-9 – In the southwestern waters in plain sight
- Start: Warp to the Odyssey. Work west from the ship toward the Beach House, then follow the outer southwest shoreline before turning north.
- What you see: The group sits in the southwestern waters without a hidden trigger
- Route and action: Adjust Mario's depth until the complete group is level with the camera, then swim through all 3 coins in one pass.
- Common mistake: Swimming at the surface while the group sits deeper, higher or against the bank.
Purple Coins #10-12 – At the southwestern point of the kingdom, up high
- Start: Warp to the Odyssey. Work west from the ship toward the Beach House, then follow the outer southwest shoreline before turning north.
- What you see: The group is positioned at the southwestern point of the kingdom, up high. They can be reached with a Gushen
- Route and action: Use the stated setup: A Gushen. Pass through the full 3-coin group before releasing the capture or leaving the platform.
- Common mistake: Searching only at ground level instead of checking the roof, pillar or upper ledge.
Purple Coins #13-15 – In the southwestern waters, in an alcove
- Start: Warp to the Odyssey. Work west from the ship toward the Beach House, then follow the outer southwest shoreline before turning north.
- What you see: The group sits in the southwestern waters, in an alcove
- Route and action: Adjust Mario's depth until the complete group is level with the camera, then swim through all 3 coins in one pass.
- Common mistake: Staying on the obvious route and never turning the camera around or below the landmark.
Purple Coins #16-18 – At the northernmost part of the southwest beach, in an…
- Start: Warp to the Odyssey. Work west from the ship toward the Beach House, then follow the outer southwest shoreline before turning north.
- What you see: The group is positioned at the northernmost part of the southwest beach, in an alcove beside a Cheep Cheep
- Route and action: Move around or below the landmark until the recess is fully visible, then enter it and collect all 3 coins before returning to the main route.
- Common mistake: Staying on the obvious route and never turning the camera around or below the landmark.
Lighthouse Island and Underwater Tunnel
Start at the Lighthouse. Circle the island at water level, clear the interior pockets, then enter the underwater tunnel and check behind you near its far end. This section covers Purple Coins #19-21 through #34-36.
Purple Coins #19-21 – In a tunnel located under the Lighthouse island
- Start: Warp to the Lighthouse. Circle the island at water level, clear the interior pockets, then enter the underwater tunnel and check behind you near its far end.
- What you see: The group sits in a tunnel located under the Lighthouse island
- Route and action: Move around or below the landmark until the recess is fully visible, then enter it and collect all 3 coins before returning to the main route.
- Common mistake: Staying on the obvious route and never turning the camera around or below the landmark.
Purple Coins #22-24 – Inside the Lighthouse, accessed through an open doorway
- Start: Warp to the Lighthouse. Circle the island at water level, clear the interior pockets, then enter the underwater tunnel and check behind you near its far end.
- What you see: The group is inside the Lighthouse, entered through an open doorway
- Route and action: Use the stated setup: An open doorway. Pass through the full 3-coin group before releasing the capture or leaving the platform.
- Common mistake: Collecting only part of the cluster; the counter must rise by 3.
Purple Coins #25-27 – In a pit of water located at the Lighthouse
- Start: Warp to the Lighthouse. Circle the island at water level, clear the interior pockets, then enter the underwater tunnel and check behind you near its far end.
- What you see: The group sits in a pit of water located at the Lighthouse
- Route and action: Adjust Mario's depth until the complete group is level with the camera, then swim through all 3 coins in one pass.
- Common mistake: Swimming at the surface while the group sits deeper, higher or against the bank.
Purple Coins #28-30 – On the shores near the Lighthouse in plain sight
- Start: Warp to the Lighthouse. Circle the island at water level, clear the interior pockets, then enter the underwater tunnel and check behind you near its far end.
- What you see: The group rests on the shores near the Lighthouse without a hidden trigger
- Route and action: Line Mario up with the complete group and move through all 3 coins; pause long enough to confirm the regional-coin counter increases.
- Common mistake: Collecting only part of the cluster; the counter must rise by 3.
Purple Coins #31-33 – In the Underwater Tunnel to the Lighthouse, in plain sight
- Start: Warp to the Lighthouse. Circle the island at water level, clear the interior pockets, then enter the underwater tunnel and check behind you near its far end.
- What you see: The group sits in the Underwater Tunnel to the Lighthouse, without a hidden trigger
- Route and action: Adjust Mario's depth until the complete group is level with the camera, then swim through all 3 coins in one pass.
- Common mistake: Staying on the obvious route and never turning the camera around or below the landmark.
Purple Coins #34-36 – At the end of the Underwater Tunnel to the Lighthouse
- Start: Warp to the Lighthouse. Circle the island at water level, clear the interior pockets, then enter the underwater tunnel and check behind you near its far end.
- What you see: The group is positioned at the end of the Underwater Tunnel to the Lighthouse, only visible by turning back and seeing an alcove
- Route and action: Adjust Mario's depth until the complete group is level with the camera, then swim through all 3 coins in one pass.
- Common mistake: Staying on the obvious route and never turning the camera around or below the landmark.
Ocean Trench West and Northern Island
Start at Ocean Trench West. Search the trench ceiling and western wall first, then swim north of the Glass Palace and inspect the holes in the northern island. This section covers Purple Coins #37-39 through #47-49.
Purple Coins #37-39 – Under a ceiling with Komboos near the "Ocean Trench…
- Start: Warp to Ocean Trench West. Search the trench ceiling and western wall first, then swim north of the Glass Palace and inspect the holes in the northern island.
- What you see: Look below a ceiling with Komboos near the "Ocean Trench West" checkpoint flag
- Route and action: Move around or below the landmark until the recess is fully visible, then enter it and collect all 3 coins before returning to the main route.
- Common mistake: Staying on the obvious route and never turning the camera around or below the landmark.
Purple Coins #40-43 – Out in the open waters north of the Glass Palace
- Start: Warp to Ocean Trench West. Search the trench ceiling and western wall first, then swim north of the Glass Palace and inspect the holes in the northern island.
- What you see: Out in the open waters north of the Glass Palace
- Route and action: Adjust Mario's depth until the complete group is level with the camera, then swim through all 4 coins in one pass.
- Common mistake: Swimming at the surface while the group sits deeper, higher or against the bank.
Purple Coins #44-46 – Inside one of many holes in the northern island
- Start: Warp to Ocean Trench West. Search the trench ceiling and western wall first, then swim north of the Glass Palace and inspect the holes in the northern island.
- What you see: The group is inside one of many holes in the northern island
- Route and action: Move around or below the landmark until the recess is fully visible, then enter it and collect all 3 coins before returning to the main route.
- Common mistake: Staying on the obvious route and never turning the camera around or below the landmark.
Purple Coins #47-49 – In the west side of the Ocean Trench
- Start: Warp to Ocean Trench West. Search the trench ceiling and western wall first, then swim north of the Glass Palace and inspect the holes in the northern island.
- What you see: The group sits in the west side of the Ocean Trench
- Route and action: Line Mario up with the complete group and move through all 3 coins; pause long enough to confirm the regional-coin counter increases.
- Common mistake: Collecting only part of the cluster; the counter must rise by 3.
Hot Spring Island and Rocky Beach
Start at Hot Spring Island. Sweep the island from its submerged eastern side to the hot springs, then finish in the water between the island and the rocky beach. This section covers Purple Coins #50-52 through #65-67.
Purple Coins #50-52 – In a hidden tunnel deep in the eastern side of Hot…
- Start: Warp to Hot Spring Island. Sweep the island from its submerged eastern side to the hot springs, then finish in the water between the island and the rocky beach.
- What you see: The group sits in a hidden tunnel deep in the eastern side of Hot Spring Island
- Route and action: Move around or below the landmark until the recess is fully visible, then enter it and collect all 3 coins before returning to the main route.
- Common mistake: Staying on the obvious route and never turning the camera around or below the landmark.
Purple Coins #53-55 – In the largest hot spring, in an alcove
- Start: Warp to Hot Spring Island. Sweep the island from its submerged eastern side to the hot springs, then finish in the water between the island and the rocky beach.
- What you see: The group sits in the largest hot spring, in an alcove
- Route and action: Move around or below the landmark until the recess is fully visible, then enter it and collect all 3 coins before returning to the main route.
- Common mistake: Staying on the obvious route and never turning the camera around or below the landmark.
Purple Coins #56-58 – Inside a small hot spring
- Start: Warp to Hot Spring Island. Sweep the island from its submerged eastern side to the hot springs, then finish in the water between the island and the rocky beach.
- What you see: The group is inside a small hot spring
- Route and action: Line Mario up with the complete group and move through all 3 coins; pause long enough to confirm the regional-coin counter increases.
- Common mistake: Collecting only part of the cluster; the counter must rise by 3.
Purple Coins #59-61 – On Hot Spring Island, in plain sight
- Start: Warp to Hot Spring Island. Sweep the island from its submerged eastern side to the hot springs, then finish in the water between the island and the rocky beach.
- What you see: The group rests on Hot Spring Island, without a hidden trigger
- Route and action: Line Mario up with the complete group and move through all 3 coins; pause long enough to confirm the regional-coin counter increases.
- Common mistake: Collecting only part of the cluster; the counter must rise by 3.
Purple Coins #62-64 – In the waters south of Hot Spring Island, in plain sight
- Start: Warp to Hot Spring Island. Sweep the island from its submerged eastern side to the hot springs, then finish in the water between the island and the rocky beach.
- What you see: The group sits in the waters south of Hot Spring Island, without a hidden trigger
- Route and action: Adjust Mario's depth until the complete group is level with the camera, then swim through all 3 coins in one pass.
- Common mistake: Swimming at the surface while the group sits deeper, higher or against the bank.
Purple Coins #65-67 – In the water near the rocky beach where "What the…
- Start: Warp to Hot Spring Island. Sweep the island from its submerged eastern side to the hot springs, then finish in the water between the island and the rocky beach.
- What you see: The group sits in the water near the rocky beach where "What the Waves Left at the rear of" is located
- Route and action: Adjust Mario's depth until the complete group is level with the camera, then swim through all 3 coins in one pass.
- Common mistake: Staying on the obvious route and never turning the camera around or below the landmark.
Glass Palace and Ocean-Bottom Maze
Start at the Glass Palace. Clear the water east of and directly beneath the palace before entering the nearby 2D maze through its upper-right pipe. This section covers Purple Coins #68-70 through #74-76.
Purple Coins #68-70 – In the waters east of the Glass Palace, in plain sight
- Start: Warp to the Glass Palace. Clear the water east of and directly beneath the palace before entering the nearby 2D maze through its upper-right pipe.
- What you see: The group sits in the waters east of the Glass Palace, without a hidden trigger
- Route and action: Adjust Mario's depth until the complete group is level with the camera, then swim through all 3 coins in one pass.
- Common mistake: Swimming at the surface while the group sits deeper, higher or against the bank.
Purple Coins #71-73 – Underneath the Glass Palace
- Start: Warp to the Glass Palace. Clear the water east of and directly beneath the palace before entering the nearby 2D maze through its upper-right pipe.
- What you see: Look directly below the Glass Palace
- Route and action: Move around or below the landmark until the recess is fully visible, then enter it and collect all 3 coins before returning to the main route.
- Common mistake: Staying on the obvious route and never turning the camera around or below the landmark.
Purple Coins #74-76 – In the Ocean-Bottom Maze
- Start: Warp to the Glass Palace. Clear the water east of and directly beneath the palace before entering the nearby 2D maze through its upper-right pipe.
- What you see: The group sits in the Ocean-Bottom Maze, accessible by entering the top-right pipe and using a Koopa Troopa to break a Brick Block
- Route and action: Use the stated setup: Entering the top-right pipe and use a Koopa Troopa to break a Brick Block. Pass through the full 3-coin group before releasing the capture or leaving the platform.
- Common mistake: Releasing the required capture before the final jump or traversal is complete.
Rolling Canyon and Southeast Coast
Start at Rolling Canyon. Begin at water level around the canyon, then climb its side route and sweep the Back Canyon shoreline, alcoves and outer southeast point. This section covers Purple Coins #77-79 through #98-100.
Purple Coins #77-79 – In the southeastern waters, in an alcove near Rolling…
- Start: Warp to Rolling Canyon. Begin at water level around the canyon, then climb its side route and sweep the Back Canyon shoreline, alcoves and outer southeast point.
- What you see: The group sits in the southeastern waters, in an alcove near Rolling Canyon
- Route and action: Adjust Mario's depth until the complete group is level with the camera, then swim through all 3 coins in one pass.
- Common mistake: Staying on the obvious route and never turning the camera around or below the landmark.
Purple Coins #80-82 – In the southern waters near Rolling Canyon, in plain sight
- Start: Warp to Rolling Canyon. Begin at water level around the canyon, then climb its side route and sweep the Back Canyon shoreline, alcoves and outer southeast point.
- What you see: The group sits in the southern waters near Rolling Canyon, without a hidden trigger
- Route and action: Adjust Mario's depth until the complete group is level with the camera, then swim through all 3 coins in one pass.
- Common mistake: Swimming at the surface while the group sits deeper, higher or against the bank.
Purple Coins #83-85 – In an alcove near the Goombas at Rolling Canyon
- Start: Warp to Rolling Canyon. Begin at water level around the canyon, then climb its side route and sweep the Back Canyon shoreline, alcoves and outer southeast point.
- What you see: The group sits in an alcove near the Goombas at Rolling Canyon
- Route and action: Move around or below the landmark until the recess is fully visible, then enter it and collect all 3 coins before returning to the main route.
- Common mistake: Staying on the obvious route and never turning the camera around or below the landmark.
Purple Coins #86-88 – On the cliffs at the base of Rolling Canyon
- Start: Warp to Rolling Canyon. Begin at water level around the canyon, then climb its side route and sweep the Back Canyon shoreline, alcoves and outer southeast point.
- What you see: The group rests on the cliffs at the base of Rolling Canyon
- Route and action: Line Mario up with the complete group and move through all 3 coins; pause long enough to confirm the regional-coin counter increases.
- Common mistake: Collecting only part of the cluster; the counter must rise by 3.
Purple Coins #89-91 – In the southeast part of the kingdom, near "The Back…
- Start: Warp to Rolling Canyon. Begin at water level around the canyon, then climb its side route and sweep the Back Canyon shoreline, alcoves and outer southeast point.
- What you see: The group sits in the southeast part of the kingdom, near "The Back Canyon: Excavate!"
- Route and action: Line Mario up with the complete group and move through all 3 coins; pause long enough to confirm the regional-coin counter increases.
- Common mistake: Collecting only part of the cluster; the counter must rise by 3.
Purple Coins #92-94 – At the southeast point of the kingdom, in the water
- Start: Warp to Rolling Canyon. Begin at water level around the canyon, then climb its side route and sweep the Back Canyon shoreline, alcoves and outer southeast point.
- What you see: The group is positioned at the southeast point of the kingdom, in the water
- Route and action: Adjust Mario's depth until the complete group is level with the camera, then swim through all 3 coins in one pass.
- Common mistake: Swimming at the surface while the group sits deeper, higher or against the bank.
Purple Coins #95-97 – In an alcove near "The Back Canyon: Excavate!"
- Start: Warp to Rolling Canyon. Begin at water level around the canyon, then climb its side route and sweep the Back Canyon shoreline, alcoves and outer southeast point.
- What you see: The group sits in an alcove near "The Back Canyon: Excavate!"
- Route and action: Move around or below the landmark until the recess is fully visible, then enter it and collect all 3 coins before returning to the main route.
- Common mistake: Staying on the obvious route and never turning the camera around or below the landmark.
Purple Coins #98-100 – On a side path halfway up Rolling Canyon
- Start: Warp to Rolling Canyon. Begin at water level around the canyon, then climb its side route and sweep the Back Canyon shoreline, alcoves and outer southeast point.
- What you see: The group rests on a side path halfway up Rolling Canyon
- Route and action: Line Mario up with the complete group and move through all 3 coins; pause long enough to confirm the regional-coin counter increases.
- Common mistake: Collecting only part of the cluster; the counter must rise by 3.
Source Credits
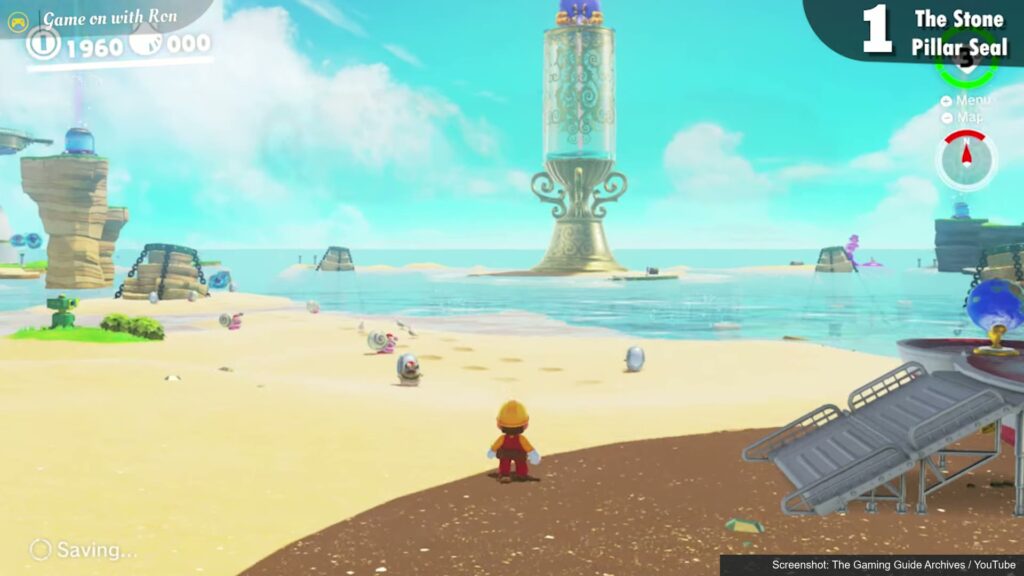
The featured image is a visibly credited gameplay frame from The Gaming Guide Archives Seaside Kingdom gameplay. It comes from The Gaming Guide Archives’ own YouTube footage. Route order and capture context were checked against BeardBear's complete Seaside Kingdom purple coin walkthrough.
Coin amounts and landmarks were independently cross-checked against the text checklist on Super Mario Wiki. No Super Mario Wiki images are reused, and no route-card images from the verification walkthrough are reused. Super Mario Odyssey and all game visuals are property of Nintendo.
FAQ
How many purple coins are in Seaside Kingdom?
Seaside Kingdom has 100 regional coins. This route covers every coin exactly once across 33 clusters.
What do Seaside Kingdom purple coins look like?
They are shell-shaped purple regional coins used in this kingdom’s Crazy Cap shop.
Should I finish the story before collecting every coin?
Defeat Mollusque-Lanceur first. The cleared fountains and unlocked checkpoints make the island-to-island cleanup much faster.
Which Seaside Kingdom purple coins are easiest to miss?
The most common misses are the turnback alcove at the end of the Lighthouse tunnel, the hole in the northern island, the Ocean-Bottom Maze set and the Back Canyon alcoves.
Do I need a Gushen for Seaside Kingdom purple coins?
Yes. A Gushen is the intended way to reach the high southwest group, and it also makes several water-to-cliff transitions safer.
Do I need all purple coins to finish Super Mario Odyssey?
No. Regional coins are optional, but collecting all of them lets you buy every kingdom-specific Crazy Cap item.
Do Seaside Kingdom purple coins respawn?
No. Every regional coin remains collected on that save file and permanently increases the kingdom counter.