
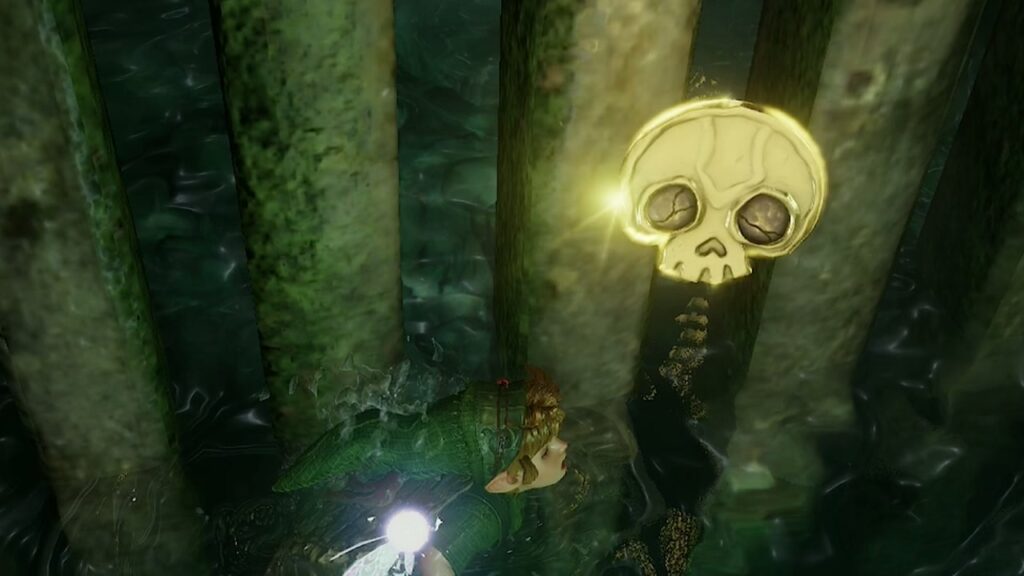
This guide lists all 100 Gold Skulltulas in The Legend of Zelda: Ocarina of Time on Nintendo Switch 2, grouped by area, with the age and time of day you need, the items that unlock each one and where to look. This is a remake, not a remaster: not every Gold Skulltula sits where it did in 1998. None of them can be missed for good. Screenshots from our own playthrough are being added.
Quick Overview
| Game | The Legend of Zelda: Ocarina of Time (Switch 2) |
|---|---|
| Area / Level | All areas |
| Total | 100 Gold Skulltulas |
| Best Route | Kokiri Forest → Hyrule Field → Kakariko → Death Mountain → Zora River → Lake Hylia → Gerudo Valley → all dungeons |
Gold Skulltula Rewards
Hand in your tokens at the House of Skulltula in Kakariko Village. These are the rewards:
- 10 tokens: Adult’s Wallet
- 20 tokens: Echo Gem
- 30 tokens: Giant’s Wallet
- 40 tokens: Bombchus
- 50 tokens: Piece of Heart
- 100 tokens: Gold Rupee, 200 Rupees on every visit
Gold Skulltula Locations
Kokiri Forest
- ○Skulltula #1 · Young Link (pending)
- ○Skulltula #2 · Young Link, night (pending)
- ○Skulltula #3 · Adult Link, night (pending)
Bug hole behind the shop
We haven't verified footage for this yet – the route below is accurate but the screenshot is still pending. Check back soon.
- You need: A bug in a bottle
- Go behind the Kokiri Forest shop and release a bug at the bug hole, then defeat the Gold Skulltula that comes out.
Behind the Know-It-All Brothers’ house
We haven't verified footage for this yet – the route below is accurate but the screenshot is still pending. Check back soon.
- You need: Nothing
- At night, go to the southwest corner of the village. The Gold Skulltula is on the tree trunk behind the house of the Know-It-All Brothers.
Behind the House of the Twins
We haven't verified footage for this yet – the route below is accurate but the screenshot is still pending. Check back soon.
- You need: Hookshot
- At night, go to the House of the Twins, across from the shop, and Hookshot the Gold Skulltula behind the house.
Great Deku Tree
- ○Skulltula #4 · Young Link (pending)
- ○Skulltula #5 · Young Link (pending)
- ○Skulltula #6 · Young Link (pending)
- ○Skulltula #7 · Young Link (pending)
Compass Room on 3F
We haven't verified footage for this yet – the route below is accurate but the screenshot is still pending. Check back soon.
- You need: Nothing
- In the Compass Room, step on the stone switch to raise the platforms, cross them and go through the opening on the left.
- Slash the Gold Skulltula on the wall.
Vine wall in B1
We haven't verified footage for this yet – the route below is accurate but the screenshot is still pending. Check back soon.
- You need: Fairy Slingshot
- After falling through the big web, turn around to face the vine wall leading back up.
- Shoot the Gold Skulltula, then climb up for the token.
Metal bars in B1
We haven't verified footage for this yet – the route below is accurate but the screenshot is still pending. Check back soon.
- You need: Fairy Slingshot
- In the same room, look left of the stone switch, at the metal bars near the torch.
- Shoot the Gold Skulltula, then jump from the stone platform to reach the token.
Gohma Larva room in B1
We haven't verified footage for this yet – the route below is accurate but the screenshot is still pending. Check back soon.
- You need: Deku Stick, Fairy Slingshot
- In the room where the three Gohma Larvae drop down, burn the web on the left with a Deku Stick.
- In the side passage, defeat the big Skulltula, shoot the Gold Skulltula on the vines and climb up for the token.
Hyrule Field
- ○Skulltula #8 · Adult Link (pending)
- ○Skulltula #9 · Adult Link (pending)
- ○Skulltula #10 · Adult Link (pending)
Lone tree west of Kokiri Forest
We haven't verified footage for this yet – the route below is accurate but the screenshot is still pending. Check back soon.
- You need: Nothing
- Go directly west of the Kokiri Forest entrance to the skinny tree where the river ends, and roll into it.
Bomb hole near Lake Hylia
We haven't verified footage for this yet – the route below is accurate but the screenshot is still pending. Check back soon.
- You need: Bombs
- In the southeast of the map near Lake Hylia, find the wet area with Tektites and shallow pools.
- Bomb the grey cracked circle in the ground, drop into the hole and break the wooden crate.
Bomb hole west of the Lake Hylia entrance
We haven't verified footage for this yet – the route below is accurate but the screenshot is still pending. Check back soon.
- You need: Bombs, Hookshot
- Just west of the Lake Hylia entrance, enter the forest with the Deku Scrubs and hug the rock wall until you find a bombable hole.
- Drop in, defeat the big Skulltula, look up and Hookshot the Gold Skulltula.
Hyrule Castle Town and Hyrule Castle
- ○Skulltula #11 · Young Link (pending)
- ○Skulltula #12 · Young Link (pending)
- ○Skulltula #13 · Young Link (pending)
Storage house by the Market gate
We haven't verified footage for this yet – the route below is accurate but the screenshot is still pending. Check back soon.
- You need: Nothing
- Right after entering Hyrule Castle Town through the gate, take the door on your right.
- At the back of the room are two wooden crates. Roll into the one closest to the guard.
Tree on the way to Talon
We haven't verified footage for this yet – the route below is accurate but the screenshot is still pending. Check back soon.
- You need: Nothing
- Past the guards in the castle grounds, go to the end of the first courtyard, where the vine wall is.
- Roll into the tree on the right.
Song of Storms hole
We haven't verified footage for this yet – the route below is accurate but the screenshot is still pending. Check back soon.
- You need: Song of Storms, bombs, Boomerang
- Near the spot where you woke Talon, find the large plant with three flat leaves behind a tree, and play the Song of Storms next to it.
- Drop into the hole, blow open the bombable walls and grab the Gold Skulltula with the Boomerang.
Lon Lon Ranch
- ○Skulltula #14 · Young Link (pending)
- ○Skulltula #15 · Young Link, night (pending)
- ○Skulltula #16 · Young Link, night (pending)
Tree behind the house
We haven't verified footage for this yet – the route below is accurate but the screenshot is still pending. Check back soon.
- You need: Nothing
- When you enter the ranch, take the left path around the buildings into the garden behind them, and roll into the skinny tree.
On the front of the ranch house
We haven't verified footage for this yet – the route below is accurate but the screenshot is still pending. Check back soon.
- You need: Boomerang
- At night, look up over the door of the house on the left. Grab the Gold Skulltula with the Boomerang, or with the Hookshot as adult Link.
Inside the ruined tower
We haven't verified footage for this yet – the route below is accurate but the screenshot is still pending. Check back soon.
- You need: Boomerang or Hookshot
- At night, enter the ruined stone tower of the ranch and look up. The Gold Skulltula is clinging to the vines.
Kakariko Village and Graveyard
- ○Skulltula #17 · Young Link, night (pending)
- ○Skulltula #18 · Young Link, night (pending)
- ○Skulltula #19 · Young Link, night (pending)
- ○Skulltula #20 · Young Link, night (pending)
- ○Skulltula #21 · Young Link, night (pending)
- ○Skulltula #22 · Young Link (pending)
- ○Skulltula #23 · Young Link, night (pending)
- ○Skulltula #24 · Adult Link (pending)
Tree near the village entrance
We haven't verified footage for this yet – the route below is accurate but the screenshot is still pending. Check back soon.
- You need: Nothing
- At night, go to the tree near the entrance from Hyrule Field, where the foreman’s son sits, and roll into it.
On the watchtower
We haven't verified footage for this yet – the route below is accurate but the screenshot is still pending. Check back soon.
- You need: Fairy Slingshot
- At night, look up the ladder of the watchtower. Shoot the Gold Skulltula and climb up for the token.
Construction site
We haven't verified footage for this yet – the route below is accurate but the screenshot is still pending. Check back soon.
- You need: Nothing
- At night, walk around the construction site in the middle of the village. The Gold Skulltula is on the wall facing the Cucco pen.
Behind the house by the Death Mountain gate
We haven't verified footage for this yet – the route below is accurate but the screenshot is still pending. Check back soon.
- You need: Nothing
- At night, go to the gate to Death Mountain Trail. The Gold Skulltula is on the wall behind the house to the left of the guard.
House of Skulltula
We haven't verified footage for this yet – the route below is accurate but the screenshot is still pending. Check back soon.
- You need: Nothing
- At night, walk up to the door of the House of Skulltula. The Gold Skulltula is directly to the left of it.
Bug hole in the Graveyard
We haven't verified footage for this yet – the route below is accurate but the screenshot is still pending. Check back soon.
- You need: A bug in a bottle
- In the Kakariko Graveyard, go up the small incline on the left. Release a bug at the bug hole by the tree.
Behind Dampé’s house
We haven't verified footage for this yet – the route below is accurate but the screenshot is still pending. Check back soon.
- You need: Boomerang
- At night, go behind Dampé’s house in the Graveyard. The Gold Skulltula is on the right by the fence: grab it with the Boomerang.
Impa’s house
We haven't verified footage for this yet – the route below is accurate but the screenshot is still pending. Check back soon.
- You need: Hookshot
- Hookshot to the vines on the cliff to the left of Impa’s house and climb onto the roof.
- Hookshot the Gold Skulltula on the wall.
Lost Woods
- ○Skulltula #25 · Young Link (pending)
- ○Skulltula #26 · Young Link (pending)
- ○Skulltula #27 · Adult Link (pending)
First bug hole
We haven't verified footage for this yet – the route below is accurate but the screenshot is still pending. Check back soon.
- You need: A bug in a bottle
- From the Kokiri Forest entrance, go left, then left again. Release a bug at the bug hole right on your left.
Bug hole with the two Deku Scrubs
We haven't verified footage for this yet – the route below is accurate but the screenshot is still pending. Check back soon.
- You need: A bug in a bottle
- From the Kokiri Forest entrance, go right, left, right, left, left.
- Stun the two Deku Scrubs by reflecting their shots, then release a bug at the bug hole in the back right corner.
Magic Bean Flower
We haven't verified footage for this yet – the route below is accurate but the screenshot is still pending. Check back soon.
- You need: Magic Bean
- As young Link, plant a Magic Bean in that same bug hole.
- As adult Link, ride the flower up to the ledge with the Gold Skulltula.
Sacred Grove
- ○Skulltula #28 · Adult Link (pending)
Above the maze
We haven't verified footage for this yet – the route below is accurate but the screenshot is still pending. Check back soon.
- You need: Hookshot
- In the maze with the Moblins, climb the ladder before you take the straight path toward the Moblin with the mace.
- On top of the maze, turn left and Hookshot the Gold Skulltula on the wall.
Death Mountain Trail
- ○Skulltula #29 · Young Link (pending)
- ○Skulltula #30 · Either (pending)
- ○Skulltula #31 · Adult Link (pending)
- ○Skulltula #32 · Adult Link (pending)
Bug hole at Dodongo Cavern
We haven't verified footage for this yet – the route below is accurate but the screenshot is still pending. Check back soon.
- You need: A bug in a bottle
- At the entrance you blew open, release a bug at the bug hole on the right side of the cave opening.
Cracked wall on the trail
We haven't verified footage for this yet – the route below is accurate but the screenshot is still pending. Check back soon.
- You need: Bombs
- On the path from Kakariko Village to Dodongo Cavern, bomb the cracked wall on the right side.
Rock below Biggoron
We haven't verified footage for this yet – the route below is accurate but the screenshot is still pending. Check back soon.
- You need: Megaton Hammer
- At the top of the mountain, just below Biggoron, break the large grey rock with the Megaton Hammer.
Rock outside Goron City
We haven't verified footage for this yet – the route below is accurate but the screenshot is still pending. Check back soon.
- You need: Megaton Hammer
- Just outside Goron City, find the large grey rock along the cliffside and break it with the Megaton Hammer.
Goron City
- ○Skulltula #33 · Either (pending)
- ○Skulltula #34 · Adult Link (pending)
Rock maze on the top floor
We haven't verified footage for this yet – the route below is accurate but the screenshot is still pending. Check back soon.
- You need: Bombs
- On entering the city, go left and bomb the tall rocks. Follow the path to the cluster of rocks: only the normal-looking ones break, the grey ones do not.
- Blow up the first rock on the right, go on and blow up the next one on the left, then the one on your right.
- At the back are two small chests and a wooden crate. Roll into the crate.
Hanging centerpiece
We haven't verified footage for this yet – the route below is accurate but the screenshot is still pending. Check back soon.
- You need: Hookshot
- On the second floor, go to the north side and look up at the rock suspended over the middle of the city. Hookshot the Gold Skulltula on it.
Dodongo Cavern
- ○Skulltula #35 · Young Link (pending)
- ○Skulltula #36 · Young Link (pending)
- ○Skulltula #37 · Young Link (pending)
- ○Skulltula #38 · Young Link (pending)
- ○Skulltula #39 · Adult Link (pending)
Side room off the Baby Dodongo hall (1F)
We haven't verified footage for this yet – the route below is accurate but the screenshot is still pending. Check back soon.
- You need: Bombs, or a Baby Dodongo
- In the hall with the Baby Dodongos, blow open the cracked wall on the right, with a bomb or by luring a Baby Dodongo next to it.
- Defeat the Gold Skulltula in the small chamber behind it.
Staircase room (2F)
We haven't verified footage for this yet – the route below is accurate but the screenshot is still pending. Check back soon.
- You need: Fairy Slingshot
- At the top of the Bomb Flower staircase, face the large wall with the netting.
- Shoot the Gold Skulltula and climb up for the token.
Behind the rock by the bridge (2F)
We haven't verified footage for this yet – the route below is accurate but the screenshot is still pending. Check back soon.
- You need: Bombs
- Next to the suspension bridge over the Dodongo skull, bomb the breakable wall.
- Defeat the two Dodongos inside and check behind the large rock.
Block room (1F)
We haven't verified footage for this yet – the route below is accurate but the screenshot is still pending. Check back soon.
- You need: Bombs
- In the block room, move the loose block in front of the cracked wall, drop a bomb on top of it and enter the side room.
- Defeat the Armos and Baby Dodongos. The Gold Skulltula is on the back wall.
Scarecrow in the Baby Dodongo hall (1F)
We haven't verified footage for this yet – the route below is accurate but the screenshot is still pending. Check back soon.
- You need: Scarecrow’s Song, Hookshot
- Return as adult Link. About halfway down the Baby Dodongo hall, play the Scarecrow’s Song below the north wall.
- Hookshot up to the scarecrow to reach the Gold Skulltula.
Death Mountain Crater
- ○Skulltula #40 · Either (pending)
- ○Skulltula #41 · Young Link (pending)
Crates at the entrance
We haven't verified footage for this yet – the route below is accurate but the screenshot is still pending. Check back soon.
- You need: Nothing
- At the top of Death Mountain, go inside and turn left to the two wooden crates. Break the farther crate, defeat the Gold Skulltula and leave quickly: the heat burns you.
Bug hole by the warp point
We haven't verified footage for this yet – the route below is accurate but the screenshot is still pending. Check back soon.
- You need: A bug in a bottle, Bolero of Fire
- As young Link, warp in with the Bolero of Fire and quickly release a bug at the bug hole by the warp point, next to the Fire Temple entrance.
Zora River
- ○Skulltula #42 · Young Link (pending)
- ○Skulltula #43 · Young Link, night (pending)
- ○Skulltula #44 · Adult Link, night (pending)
- ○Skulltula #45 · Adult Link, night (pending)
Bug hole by the Magic Bean seller
We haven't verified footage for this yet – the route below is accurate but the screenshot is still pending. Check back soon.
- You need: A bug in a bottle
- Release a bug at the bug hole right next to the Magic Bean seller. This Gold Skulltula is new in the remake.
Behind the pillar at the end of the river
We haven't verified footage for this yet – the route below is accurate but the screenshot is still pending. Check back soon.
- You need: Boomerang
- At night, go to the end of the river and jump down to the lowest level. The Gold Skulltula is behind the stone column under the bridge.
Middle of the river
We haven't verified footage for this yet – the route below is accurate but the screenshot is still pending. Check back soon.
- You need: Magic Bean, Hookshot
- As young Link, plant a Magic Bean next to the seller. As adult Link, ride the flower to the raised section in the middle of the river.
- Jump across the small gap and Hookshot the Gold Skulltula on the wall.
High above the Zora Domain entrance
We haven't verified footage for this yet – the route below is accurate but the screenshot is still pending. Check back soon.
- You need: Hookshot or Longshot
- At night, go to the end of the river and look high up the northwest wall. Standing on the stone railing, you can just reach it with the Hookshot.
Zora Domain
- ○Skulltula #46 · Adult Link (pending)
Near the diving game
We haven't verified footage for this yet – the route below is accurate but the screenshot is still pending. Check back soon.
- You need: Hookshot
- In frozen Zora Domain, go to where you played the diving mini-game. Hookshot the Gold Skulltula high on the wall to the left.
Zora Fountain
- ○Skulltula #47 · Young Link (pending)
- ○Skulltula #48 · Young Link, night (pending)
- ○Skulltula #49 · Adult Link, night (pending)
Tree near the Great Fairy
We haven't verified footage for this yet – the route below is accurate but the screenshot is still pending. Check back soon.
- You need: Nothing
- In the south of Zora Fountain, near the Great Fairy Fountain, roll into the lone tree with a golden glow near the top.
By the ruins
We haven't verified footage for this yet – the route below is accurate but the screenshot is still pending. Check back soon.
- You need: Boomerang
- At night, go to the submerged arch and ruins along the south wall. The Gold Skulltula is high on the wall across from them.
Skulltula cave
We haven't verified footage for this yet – the route below is accurate but the screenshot is still pending. Check back soon.
- You need: Silver Gauntlets, Lenses of Truth, Sun’s Song
- Near the Great Fairy Fountain, lift the rocks with the Silver Gauntlets and enter.
- Use the Lenses of Truth against the invisible Skulltulas and fight your way to the top.
- Play the Sun’s Song to make it night. The Gold Skulltula appears above the vines you climbed.
Lord Jabu-Jabu’s Belly
- ○Skulltula #50 · Young Link (pending)
- ○Skulltula #51 · Young Link (pending)
- ○Skulltula #52 · Young Link (pending)
- ○Skulltula #53 · Young Link (pending)
Dungeon Map room (B1)
We haven't verified footage for this yet – the route below is accurate but the screenshot is still pending. Check back soon.
- You need: Nothing
- After raising the water, swim to the vines across from the large chest and climb up. The Gold Skulltula is on the wall.
North wall of the main room (B1)
We haven't verified footage for this yet – the route below is accurate but the screenshot is still pending. Check back soon.
- You need: Boomerang
- Clear the tentacles, then drop down the hole in the main chamber. The Gold Skulltula is on the north wall.
Hallway to Bigocto (B1)
We haven't verified footage for this yet – the route below is accurate but the screenshot is still pending. Check back soon.
- You need: Boomerang
- In the same room, enter the hallway that leads to Bigocto and look up and to the left.
Column outside the boss room
We haven't verified footage for this yet – the route below is accurate but the screenshot is still pending. Check back soon.
- You need: Boomerang or Fairy Slingshot
- At the large column with vines outside the boss room, shoot the Gold Skulltula and climb up for the token, or grab it with the Boomerang.
Lake Hylia
- ○Skulltula #54 · Young Link (pending)
- ○Skulltula #55 · Young Link (pending)
- ○Skulltula #56 · Young Link, night (pending)
- ○Skulltula #57 · Adult Link (pending)
- ○Skulltula #58 · Adult Link, night (pending)
Bug hole at the Lakeside Laboratory
We haven't verified footage for this yet – the route below is accurate but the screenshot is still pending. Check back soon.
- You need: A bug in a bottle
- Right of the laboratory door, release a bug at the bug hole.
Laboratory wall
We haven't verified footage for this yet – the route below is accurate but the screenshot is still pending. Check back soon.
- You need: Boomerang or Hookshot
- At night, walk onto the suspension bridge next to the Lakeside Laboratory and look at the back wall.
Bottom of the laboratory tank
We haven't verified footage for this yet – the route below is accurate but the screenshot is still pending. Check back soon.
- You need: Iron Boots, Zora Tunic, Hookshot
- In the Lakeside Laboratory, sink to the bottom of the dive tank and roll into the wooden crate.
- Defeat the Gold Skulltula with the Hookshot and grab the token.
Top of the central tree
We haven't verified footage for this yet – the route below is accurate but the screenshot is still pending. Check back soon.
- You need: Longshot
- Go to the central island and use the Longshot to reach the top of the large tree.
Gerudo Valley
- ○Skulltula #59 · Young Link, night (pending)
- ○Skulltula #60 · Young Link (pending)
- ○Skulltula #61 · Adult Link, night (pending)
- ○Skulltula #62 · Adult Link, night (pending)
Under the plank bridge
We haven't verified footage for this yet – the route below is accurate but the screenshot is still pending. Check back soon.
- You need: Boomerang
- At night, drop into the water below the plank bridge. The Gold Skulltula is under the bridge at the far end.
Bug hole by the cow
We haven't verified footage for this yet – the route below is accurate but the screenshot is still pending. Check back soon.
- You need: A Cucco, a bug in a bottle
- Grab the Cucco by the bridge and fly down to the ledge by the waterfall, where a Gerudo tends a cow.
- Release a bug at the bug hole nearby.
Arch at the Carpenter’s Camp
We haven't verified footage for this yet – the route below is accurate but the screenshot is still pending. Check back soon.
- You need: Hookshot or Longshot
- At night, cross to the Carpenter’s Camp and go toward the stone arch with the large grey rocks. The Gold Skulltula is on the column above them.
Wall behind the tent
We haven't verified footage for this yet – the route below is accurate but the screenshot is still pending. Check back soon.
- You need: Longshot
- At night, look at the wall directly behind the tent at the Carpenter’s Camp.
Gerudo Fortress
- ○Skulltula #63 · Adult Link, night (pending)
- ○Skulltula #64 · Adult Link, night (pending)
On the fortress wall
We haven't verified footage for this yet – the route below is accurate but the screenshot is still pending. Check back soon.
- You need: Longshot, Gerudo Pass
- Once the Gerudo let you move freely, make it night and go to the west side of the fortress. The Gold Skulltula is high on the wall in a small gap by a door.
Far target at the archery range
We haven't verified footage for this yet – the route below is accurate but the screenshot is still pending. Check back soon.
- You need: Longshot
- At night, go to the far end of the horse archery range. Stand by the fence and use the Longshot on the Gold Skulltula on the back of the last target.
Mirage Desert
- ○Skulltula #65 · Adult Link (pending)
Abandoned temple
We haven't verified footage for this yet – the route below is accurate but the screenshot is still pending. Check back soon.
- You need: Nothing
- About halfway through the desert, shelter inside the small abandoned temple and go down the ladder. The Gold Skulltula is on the wall by the unlit torches.
Evil Desert Colossus
- ○Skulltula #66 · Young Link (pending)
- ○Skulltula #67 · Adult Link, night (pending)
- ○Skulltula #68 · Adult Link, night (pending)
Bug hole by the Spirit Temple
We haven't verified footage for this yet – the route below is accurate but the screenshot is still pending. Check back soon.
- You need: A bug in a bottle, Requiem of Spirit
- As young Link, warp in with the Requiem of Spirit and release a bug at the bug hole left of the Spirit Temple entrance.
Magic Bean Flower
We haven't verified footage for this yet – the route below is accurate but the screenshot is still pending. Check back soon.
- You need: Magic Bean
- As young Link, plant a Magic Bean in that bug hole. As adult Link, ride the flower to the second massive rock. The Gold Skulltula is on top of it.
Rocky wall in the north
We haven't verified footage for this yet – the route below is accurate but the screenshot is still pending. Check back soon.
- You need: Longshot
- North of the Spirit Temple entrance, near the flock of birds, use the Longshot on the Gold Skulltula on the wall.
Ganon’s Castle
- ○Skulltula #69 · Adult Link, night (pending)
Ruins outside the castle
We haven't verified footage for this yet – the route below is accurate but the screenshot is still pending. Check back soon.
- You need: Hookshot
- On the castle grounds, look up at the ruins of the old Hyrule Castle gate and Hookshot the Gold Skulltula.
Forest Temple
- ○Skulltula #70 · Adult Link (pending)
- ○Skulltula #71 · Adult Link (pending)
- ○Skulltula #72 · Adult Link (pending)
- ○Skulltula #73 · Adult Link (pending)
- ○Skulltula #74 · Adult Link (pending)
Temple entrance
We haven't verified footage for this yet – the route below is accurate but the screenshot is still pending. Check back soon.
- You need: Hookshot
- At the entrance, look at the top of the vine-covered tree on the right and Hookshot the Gold Skulltula.
Grand Hall
We haven't verified footage for this yet – the route below is accurate but the screenshot is still pending. Check back soon.
- You need: Hookshot
- In the main hall, go to the top of the stairs on the north side, turn right and Hookshot the Gold Skulltula on the wall.
Second floor of the garden
We haven't verified footage for this yet – the route below is accurate but the screenshot is still pending. Check back soon.
- You need: Hookshot
- In the garden with the well, carefully follow the ledge to the left of the second-floor door, around the corner, and Hookshot the Gold Skulltula.
West Garden balcony
We haven't verified footage for this yet – the route below is accurate but the screenshot is still pending. Check back soon.
- You need: Scarecrow’s Song, Hookshot
- After you push the large block down, look up at the small balcony, play the Scarecrow’s Song and pull yourself up.
Outside the boss room
We haven't verified footage for this yet – the route below is accurate but the screenshot is still pending. Check back soon.
- You need: Nothing
- In the last room before the boss, rotate the room with the pillar four times until you can enter the green chamber with the pots. Look up at the wall.
Fire Temple
- ○Skulltula #75 · Adult Link (pending)
- ○Skulltula #76 · Adult Link (pending)
- ○Skulltula #77 · Adult Link (pending)
- ○Skulltula #78 · Adult Link (pending)
- ○Skulltula #79 · Adult Link (pending)
First Flying Tile room (1F)
We haven't verified footage for this yet – the route below is accurate but the screenshot is still pending. Check back soon.
- You need: Song of Time
- In the large lava cavern, stand on the rising platform in the back left corner and play the Song of Time at the block.
- Defeat the Flying Tiles and the Like Like. The Gold Skulltula is on the back wall.
Boulder maze (3F)
We haven't verified footage for this yet – the route below is accurate but the screenshot is still pending. Check back soon.
- You need: Bombs
- In the boulder maze, head right to the north side and bomb the wall in the northeast corner.
Scarecrow room (4F)
We haven't verified footage for this yet – the route below is accurate but the screenshot is still pending. Check back soon.
- You need: Scarecrow’s Song, Hookshot
- In the boulder room, find the scarecrow spawn point, play the Scarecrow’s Song and pull yourself up, then grapple to the small elevator across from it.
- The Gold Skulltula is at the very top of the next room.
Treasure chest room (5F)
We haven't verified footage for this yet – the route below is accurate but the screenshot is still pending. Check back soon.
- You need: Hookshot
- Go through the door after the previous Gold Skulltula, look right and Hookshot it off the wall. This is the room with the Megaton Hammer.
Second Flying Tile room (1F)
We haven't verified footage for this yet – the route below is accurate but the screenshot is still pending. Check back soon.
- You need: Megaton Hammer
- Smash the statue in the entrance room to reach this room, then break the large grey rock on the back wall.
Ice Cavern
- ○Skulltula #80 · Adult Link (pending)
- ○Skulltula #81 · Adult Link (pending)
- ○Skulltula #82 · Adult Link (pending)
Spinning blade room
We haven't verified footage for this yet – the route below is accurate but the screenshot is still pending. Check back soon.
- You need: Hookshot
- From the door, look left and up the ice wall. Stay away from the blade and Hookshot the Gold Skulltula.
Compass room
We haven't verified footage for this yet – the route below is accurate but the screenshot is still pending. Check back soon.
- You need: Hookshot
- Approach the chest and look left, into the carved section of the ice column.
Sliding block room
We haven't verified footage for this yet – the route below is accurate but the screenshot is still pending. Check back soon.
- You need: Hookshot
- Walk to where you move the ice block, turn around and look above your head.
Water Temple
- ○Skulltula #83 · Adult Link (pending)
- ○Skulltula #84 · Adult Link (pending)
- ○Skulltula #85 · Adult Link (pending)
- ○Skulltula #86 · Adult Link (pending)
- ○Skulltula #87 · Adult Link (pending)
Under the central tower
We haven't verified footage for this yet – the route below is accurate but the screenshot is still pending. Check back soon.
- You need: Iron Boots, Hookshot
- With the water at the second floor, sink to the bottom of the central tower and drop through the floor.
- Defeat the spikes, Hookshot the gem switch to open the gate above you, and float up to the Gold Skulltula.
Behind the bombable wall (2F)
We haven't verified footage for this yet – the route below is accurate but the screenshot is still pending. Check back soon.
- You need: Iron Boots, bombs
- With the water at the second floor, enter the room where you met Ruto and float to the surface.
- Blow open the cracked wall on the east side. The Gold Skulltula is inside, past the Shell Blades.
Whirlpool river
We haven't verified footage for this yet – the route below is accurate but the screenshot is still pending. Check back soon.
- You need: Iron Boots, Longshot
- In the river after the Longshot chest, walk along the bottom. At the first bend to the right, look for the gold shimmer above you and use the Longshot.
Top of the central tower
We haven't verified footage for this yet – the route below is accurate but the screenshot is still pending. Check back soon.
- You need: Longshot
- With the water lowered, go inside the central tower, use the Longshot on the grapple points and look up to the corner of the ceiling.
Behind the waterfall by the Boss Key
We haven't verified footage for this yet – the route below is accurate but the screenshot is still pending. Check back soon.
- You need: Longshot
- In the hallway with the rolling boulder before the Boss Key room, look up behind the small waterfall.
Bottom of the Well
- ○Skulltula #88 · Young Link (pending)
- ○Skulltula #89 · Young Link (pending)
- ○Skulltula #90 · Young Link (pending)
Like Like room
We haven't verified footage for this yet – the route below is accurate but the screenshot is still pending. Check back soon.
- You need: Lenses of Truth, Boomerang
- In the northwest corner, clear the room with the Fire Keese and the Beamos, then use the Lenses of Truth to avoid the pits down to the basement.
- Go through the south door, defeat the Like Like and take the Gold Skulltula on the east wall.
First locked room
We haven't verified footage for this yet – the route below is accurate but the screenshot is still pending. Check back soon.
- You need: Lenses of Truth, Boomerang
- On the outer path along the east side, use the Lenses of Truth to find the chest with a Small Key.
- Unlock the door in the back left corner of the central chamber.
Second locked room
We haven't verified footage for this yet – the route below is accurate but the screenshot is still pending. Check back soon.
- You need: Deku Stick, Boomerang, Lenses of Truth
- On the far west side, dive under the arch and go through the door. Burn the coffin between the torches with a Deku Stick for a Small Key.
- Unlock the other room in the center and follow the hidden path to the Gold Skulltula.
Shadow Temple
- ○Skulltula #91 · Adult Link (pending)
- ○Skulltula #92 · Adult Link (pending)
- ○Skulltula #93 · Adult Link (pending)
- ○Skulltula #94 · Adult Link (pending)
- ○Skulltula #95 · Adult Link (pending)
Invisible scythe room
We haven't verified footage for this yet – the route below is accurate but the screenshot is still pending. Check back soon.
- You need: Lenses of Truth
- Defeat the enemies in the room, go through the unlocked door and check the back wall.
Spike crusher room
We haven't verified footage for this yet – the route below is accurate but the screenshot is still pending. Check back soon.
- You need: Longshot
- Before you cross to the small chest, climb on top of the crusher traps to reach the northeast corner, and use the Longshot.
Fan hallway
We haven't verified footage for this yet – the route below is accurate but the screenshot is still pending. Check back soon.
- You need: Hover Boots, Iron Boots, Longshot
- At the end of the hall with the fans, cross with the Hover Boots when the fan stops, and put on the Iron Boots so you do not get blown away.
- Turn around and use the Longshot on the Gold Skulltula on the wall of the pit.
The docks
We haven't verified footage for this yet – the route below is accurate but the screenshot is still pending. Check back soon.
- You need: Scarecrow’s Song, Longshot
- Before you board the ferry, play the Scarecrow’s Song above the stone block you pulled, and Longshot up. The Gold Skulltula is directly left of the scarecrow.
Spinning skull vases
We haven't verified footage for this yet – the route below is accurate but the screenshot is still pending. Check back soon.
- You need: Bombs
- North of the invisible maze after the ferry, go up the stairs and throw a bomb into each of the three spinning vases.
- One of them releases the Gold Skulltula. Run down and defeat it.
Spirit Temple
- ○Skulltula #96 · Young Link (pending)
- ○Skulltula #97 · Young Link (pending)
- ○Skulltula #98 · Young Link (pending)
- ○Skulltula #99 · Adult Link (pending)
- ○Skulltula #100 · Adult Link (pending)
Silver Diamond room (1F)
We haven't verified footage for this yet – the route below is accurate but the screenshot is still pending. Check back soon.
- You need: Boomerang
- After you drop part of the fenced wall to make a bridge, use the Boomerang on the Gold Skulltula and collect the token with it.
Base of the colossus (2F)
We haven't verified footage for this yet – the route below is accurate but the screenshot is still pending. Check back soon.
- You need: Nothing
- At the base of the massive statue, go to the northeast corner on the right.
Hallway to the Iron Knuckle (3F)
We haven't verified footage for this yet – the route below is accurate but the screenshot is still pending. Check back soon.
- You need: Boomerang
- In the hallway between the Iron Knuckle room and the Silver Diamond room, look above the door and use the Boomerang.
Rolling boulder room (1F)
We haven't verified footage for this yet – the route below is accurate but the screenshot is still pending. Check back soon.
- You need: Song of Time
- In the back left corner of the rolling boulder room, play the Song of Time to move the block out of the small nook.
Colossus room scarecrow
We haven't verified footage for this yet – the route below is accurate but the screenshot is still pending. Check back soon.
- You need: Scarecrow’s Song, Longshot
- After taking the Small Key from the chest on the statue’s hand, look up to the northwest corner and play the Scarecrow’s Song.
- Longshot up to the ledge. The Gold Skulltula is right next to the scarecrow.
Sources and Image Credits
Locations were cross-checked between the Switch 2 guides from TheGamer and Nintendo Life. Screenshots from our own playthrough are being added. The Legend of Zelda: Ocarina of Time and related visuals are property of Nintendo.
FAQ
How many Gold Skulltulas are in the Ocarina of Time remake?
The Switch 2 remake has 100 Gold Skulltulas, the same total as the original, but not all of them are in the same spots. Hand in the tokens at the House of Skulltula in Kakariko Village to collect the rewards.
What does the Echo Gem do?
The Echo Gem is new in the remake and replaces the Stone of Agony. You get it for 20 tokens. It blinks and makes a sound when you are near a Gold Skulltula, even during the day if that spider only appears at night.
Can you miss any Gold Skulltulas?
No. None of the 100 can be missed for good, because you can return to dungeons and areas you have already finished.
How do you get a Gold Skulltula out of a bug hole?
Catch a bug in a bottle, for example by cutting grass, and release it at the bug hole. The bug crawls in and forces the Gold Skulltula out, so you can defeat it.
How many Gold Skulltulas do you need?
50 is the best target, because that gives you a Piece of Heart. The reward for all 100 is mainly for completionists: a Gold Rupee each time you visit the House of Skulltula.