
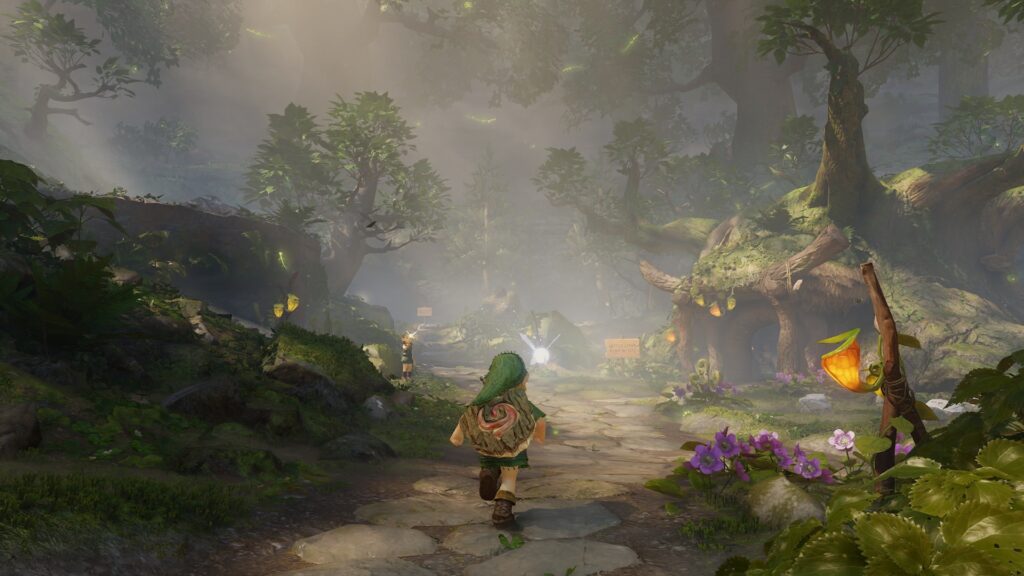
This Ocarina of Time walkthrough takes you through the full main route of the Nintendo Switch 2 remake: every dungeon in order, the items and songs that open each next area, and how to beat the bosses. The story follows the 1998 original, but roughly one in ten puzzles and locations changed, so veterans will want to read along too. Screenshots from our own playthrough are being added.
Quick Overview
| Game | The Legend of Zelda: Ocarina of Time (Switch 2) |
|---|---|
| Area / Level | Full main route |
| Total | All 9 dungeons in order |
| Best Route | Deku Tree → Dodongo Cavern → Jabu-Jabu → Master Sword → Forest, Fire, Water, Shadow and Spirit Temples → Ganon’s Castle |
Before You Start
Ocarina of Time on Switch 2 keeps the 1998 adventure: you start as young Link, collect three Spiritual Stones, and continue seven years later as adult Link to awaken the Sages. A few things work differently from the original:
- Movement: there is now a dedicated jump button, and you can sprint and dash. In the water you can dash too, and hold a button to dive. In the original, Link only jumped automatically at ledges.
- Ocarina: play songs with the buttons, or hum the melody into the Switch 2 microphone.
- Threads of Time: the new quest log shows your story progress and where your next objective is. Event Updates pop up whenever it changes, so check it whenever you lose track.
- Wallet: young Link can carry up to 200 Rupees from the start, so early shopping is less of a grind than in the original.
Read all the changes, or use our Piece of Heart guide as you go.
Kokiri Forest: Kokiri Sword and Deku Shield
- Age: Young Link
- You need: Nothing
- You get: Kokiri Sword, Deku Shield
- After the opening, explore the village. Mido blocks the tunnel to the Great Deku Tree until you carry both a sword and a shield.
- For the sword, go to the Forest Training Center in the southwest of the village, crawl through the vent and open the chest above for the Kokiri Sword.
- For the shield, collect 40 Rupees and buy the Deku Shield in the shop in the northeast. A Kokiri asks you to clear some rocks, and broken rocks can drop Rupees.
- Equip both and talk to Mido. He steps aside and lets you into the tunnel.
- In the tunnel, defeat the Deku Babas. They drop Deku Sticks, which you can light on a torch or swing as a weapon. The tunnel leads to the Great Deku Tree.
Inside the Deku Tree: Fairy Slingshot and Queen Gohma
- Age: Young Link
- You need: Kokiri Sword, Deku Shield
- You get: Fairy Slingshot, Kokiri’s Emerald
- Climb the ladder or the vines to 2F and follow the spiral path. A chest next to the big vine wall holds the Dungeon Map.
- At the end of the path, bounce the Deku Scrub’s seed back with your shield. In the next room the floating platform breaks under you: climb the vine walls to the chest with the Fairy Slingshot, then shoot the switch above the door to get out.
- Back at the big vine wall, shoot the Skulltulas and climb to 3F.
- From the central column on 3F, run and jump off the edge so you land in the middle of the web on the floor of 1F. You crash through to B1.
- In B1, step on the floor switch to light the torch, light a Deku Stick and burn the web to the south. A Deku Scrub in the next room gives you the code for later.
- In the water room, dive under the spiked log on the left and hit the switch to lower the water, then ride the platform under the log. Further on, light the torches with a Deku Stick, burn the two webs and crawl through the vent on the right.
- Push the block off the ledge, carry a burning Deku Stick over and burn the web in the floor to drop to B2.
- Reflect the seeds of the three Deku Scrubs in the order 2, 3, 1: middle, right, then left. Then go through the door and look up at the ceiling.
Boss: Queen Gohma
Lock on and keep her in view. When her eye flashes red, stun her with the Fairy Slingshot, then slash the eye while she is down. You can also shoot her on the ceiling when her eye turns green: she drops right away, before she can lay eggs.
The Great Deku Tree gives you the Kokiri’s Emerald and sends you to Hyrule Castle.
Hyrule Castle: Zelda’s Letter and Zelda’s Lullaby
- Age: Young Link
- You need: Nothing new
- You get: Fairy Ocarina, Weird Egg, Zelda’s Letter, Zelda’s Lullaby
- Leave Kokiri Forest to the west. You receive the Fairy Ocarina in a cutscene on your way out.
- Follow the path north across Hyrule Field to the drawbridge, go through the Market and enter the Hyrule Castle grounds.
- The girl from Lon Lon Ranch stands on your right and gives you the Weird Egg. Keep it in your inventory: it hatches into a Cucco while you explore.
- Climb the vines next to her, climb onto the gatehouse and drop down on the far side of the gate. Go left up the hill along the hedge to avoid the two guards, pass through the middle of the hedges and climb the vine wall at the back.
- Jump into the moat on your left. Swim under the bridge and along to the end, where Talon sleeps next to two blocks.
- Wake Talon with the Cucco, push the blocks against the moat and jump across into the vent.
- Climb the ladder and the stairs to a courtyard, then the blocks to the walkway above the guard. Wait until the next two guards turn their backs, sprint past them, and hug the right wall of the storeroom until you can run around the last corner to Zelda.
Zelda gives you Zelda’s Letter, and Impa teaches you Zelda’s Lullaby.
Tip: Lon Lon Ranch is an optional stop now: it has a Bottle and the first step toward getting Epona.
Death Mountain and Dodongo Cavern: Bomb Bag and King Dodongo
- Age: Young Link
- You need: Zelda’s Letter, Zelda’s Lullaby, Saria’s Song
- You get: Saria’s Song, Goron’s Bracelet, Bomb Bag, Goron’s Ruby
- Learn Saria’s Song in the Lost Woods first: you need it to reach Darunia.
- Go east from the drawbridge and up the steps to Kakariko Village, then show Zelda’s Letter to the guard at the north exit.
- On Death Mountain Trail, hug the wall on the right. When the path splits, go left to Goron City.
- On the lowest level of Goron City, play Zelda’s Lullaby at the north door. Talk to Darunia and play Saria’s Song for the Goron’s Bracelet, which lets you lift Bomb Flowers.
- Leave by the top entrance, go right to the Bomb Flower near the fence and throw it over to blow open Dodongo Cavern.
- Inside, bomb your way through the side passages and light the unlit torches with a Deku Stick. In the northwest room, place a Bomb Flower in the gap in the row of Bomb Flowers: the chain reaction reveals a giant staircase.
- On 2F, work through the spike maze and the Lizalfos room to the big chest with the Bomb Bag.
- From the wooden bridge above the giant Dodongo head, drop a bomb into each eye socket to open its mouth on 1F. Go through and solve the block puzzle to push the last block into the hole. This opens the boss door.
- Bomb the floor in the middle of the room and drop down.
Boss: King Dodongo
When King Dodongo breathes in, lock on and throw a bomb into his mouth, then hit him with your sword while he is stunned. Miss and you get his fire breath. Between rounds he curls up and rolls around the arena: stand in an outer corner of the lava area to let him pass. Bomb Flowers grow around the arena if you run out of bombs.
Darunia gives you the Goron’s Ruby.
Tip: With bombs in your bag, climb to the top of Death Mountain for the Great Fairy. She gives you Din’s Fire, which you need for the Shadow Temple later.
Zora Domain and Jabu-Jabu’s Belly: Boomerang and Barinade
- Age: Young Link
- You need: Bombs, Zelda’s Lullaby, Fairy Slingshot
- You get: Silver Scale, Ruto’s Letter, Boomerang, Zora Sapphire
- Zora River is east of Kakariko Village on Hyrule Field. Bomb through the boulders, follow the river to the end and play Zelda’s Lullaby in front of the waterfall.
- In Zora Domain, go left from King Zora and down to the diving mini-game at the base of the waterfall. Complete it for the Silver Scale.
- Dive into the underwater tunnel opposite the waterfall to reach Lake Hylia. Right in front of you is a submerged Bottle with a letter from Princess Ruto.
- Swim back and present the Bottle to King Zora. He opens the way to Zora Fountain.
- Scoop a fish from the shallow pool under the stairs to the King and place it in the shell-shaped recess in front of Lord Jabu-Jabu. He swallows you.
- Shoot the hanging tonsil with the Slingshot to open the door, follow Princess Ruto down the hole and carry her with you. You can throw her onto ledges and use her to hold down switches.
- In the corridor with five paths, go left and defeat the flying fish with the Slingshot for the Boomerang.
- Use the Boomerang on the red, blue and green tentacles in the side rooms. Then drop down the northwest hole, throw Ruto onto the platform and beat Bigocto.
Boss: Barinade
First lock on with the Boomerang and cut the three tentacles attached to the ceiling. Then the electric jellyfish surround it: keep your distance and wait until they power down before you destroy them. In the last phase Barinade roams the room and fires lasers: hit it with the Boomerang and charge in with your sword when it is down.
You receive the Zora Sapphire, the third Spiritual Stone.
Temple of Time: Song of Time and the Master Sword
- Age: Young Link, then adult Link
- You need: All three Spiritual Stones
- You get: Ocarina of Time, Song of Time, Master Sword
- Go to the Hyrule Castle drawbridge. After the cutscene, dive into the moat and collect the Ocarina of Time. You learn the Song of Time.
- Enter the Temple of Time, which branches off from the Market. Stand in front of the inscription at the far end and play the Song of Time.
- Go into the next room and pull the Master Sword. After the cutscene you are adult Link, and you are told to head to Kakariko Village.
Forest Temple: Hookshot, Fairy Bow and Phantom Ganon
- Age: Adult Link
- You need: Hookshot
- You get: Hookshot, Song of Storms, Minuet of Forest, Fairy Bow, Forest Medallion, Prelude of Light
- In the Kakariko Graveyard, push the tombstone in the left row and drop into the hole. Follow Dampé through the maze: the Hookshot waits at the end.
- Play the Song of Time on the blocks to get out. You come up in the windmill: grab the Piece of Heart opposite and talk to the man to learn the Song of Storms.
- Go to the end of the Lost Woods, where you learn the Minuet of Forest, and Hookshot to the target on the ledge above to start the dungeon.
- In the main lobby, four ghosts run off with the flames. Getting those flames back is the goal of the temple, so work through the side rooms with your Small Keys.
- The Fairy Bow is in this temple: use it to reach the rest of the rooms and bring all four flames back.
Boss: Phantom Ganon
In the first phase he runs toward you in several paintings. Stand at an edge so you can watch three paintings at once and shoot the real one with an arrow: the fakes turn back at the canvas, the real one comes out. In the second phase he hovers and throws energy at you. Lock on and swing your sword to hit it back, again and again, until he drops. Then charge in and slash him.
You receive the Forest Medallion. Back in the Temple of Time, Sheik teaches you the Prelude of Light, and from now on you can return to young Link by placing the Master Sword in its pedestal.
Fire Temple: Goron Tunic, Megaton Hammer and Volvagia
- Age: Adult Link
- You need: Hookshot, bombs, Goron Tunic
- You get: Goron Tunic, Bolero of Fire, Megaton Hammer, Fire Medallion
- In Goron City, go one level down and stop the rolling Goron with a bomb. He slows down near the Bomb Flowers on the left, which gives you a wider window. He is Link, son of Darunia: talk to him until he gives you the Goron Tunic.
- In Darunia’s room on the bottom level, pull the statue to open the way to Death Mountain Crater.
- Use the Hookshot to get over the drawbridge. Sheik teaches you the Bolero of Fire. Take the left doorway, drop down and follow the passage to the Fire Temple.
- The goal inside is to rescue nine imprisoned Gorons, who each give you a Small Key, and to knock down the pillar above the boss room.
- Beat the Flare Dancer on the way up: hit it with a bomb, then chase the small body underneath and slash it.
- On 5F, hit the small switch to lower the flames around the chest and race up to it for the Megaton Hammer.
- Use the Hammer on the large switches and go back down. On 3F, smash the rock wall, play the Song of Time at the block and free the Goron behind it. Hit the round panel in the floor with the Hammer to send the pillar down into the lava before the boss room.
- Get the Boss Key: it is reached from the very first room of the dungeon, through the blocks you can now smash with the Hammer.
Boss: Volvagia
Volvagia rises partly out of one of the holes. Reach it fast, hit it with the Hammer to break its armor, then attack with your sword. When it flies low breathing fire, lock on and hit it with arrows or the Hookshot. When it flies high it drops rocks: run to the opposite side and keep moving. Later it teases two holes and comes out of the third.
You receive the Fire Medallion.
Ice Cavern and Water Temple: Iron Boots, Longshot and Morpha
- Age: Adult Link
- You need: Iron Boots, Zora Tunic, Zelda’s Lullaby
- You get: Iron Boots, Serenade of Water, Zora Tunic, Longshot, Water Medallion
- Go through frozen Zora Domain to Zora Fountain and enter the Ice Cavern. Complete it for the Iron Boots, and take some Blue Fire in a bottle when you leave.
- Use the Blue Fire on King Zora to free him. He gives you the Zora Tunic, so you can breathe underwater.
- Play the Serenade of Water to warp to Lake Hylia and enter the Water Temple on the lake bottom.
- In the Main Chamber, put on the Iron Boots and sink to the bottom. Play Zelda’s Lullaby at the Triforce symbols to change the water level. You need all the levels to get through the temple.
- Follow the temple to the reflection room and trigger the fight with Dark Link on the small island. The Longshot is in the big chest right after him.
- Use the Longshot to reach the Boss Key, then return to the boss door.
Boss: Morpha
Stay away from the edges. Morpha slams a tentacle down: pull its pink core out with the Longshot and attack it with your sword while it bounces on the ground. If a tentacle grabs you, mash the button to break free. Later it summons up to nine tentacles, but only one holds the core: look for the pink mass, wait until it slams down, and pull it out again.
You receive the Water Medallion. Back on the island in Lake Hylia, a plaque hints at a morning sun puzzle: shoot an arrow at the rising sun for the Fire Arrow.
Bottom of the Well and Shadow Temple: Lenses of Truth, Hover Boots and Bongo Bongo
- Age: Young Link and adult Link
- You need: Song of Storms, Lenses of Truth, Din’s Fire, Nocturne of Shadow
- You get: Nocturne of Shadow, Lenses of Truth, Hover Boots, Shadow Medallion
- As adult Link, go to Kakariko Village. After the cutscene with Sheik, you learn the Nocturne of Shadow.
- Return to the past and play the Song of Storms inside the windmill. The windmill speeds up and the well drains.
- Drop into the well and clear the Bottom of the Well mini-dungeon for the Lenses of Truth.
- If you do not have Din’s Fire yet, get it from the Great Fairy at the top of Death Mountain.
- As adult Link, warp in with the Nocturne of Shadow. Use the Lenses of Truth to see the circle of torches, stand in the middle and cast Din’s Fire to open the door.
- Inside, keep the Lenses of Truth at hand to find hidden doors and platforms. The Hover Boots are in this temple. Get the Boss Key and head for the boss room with your Fairy Bow ready.
Boss: Bongo Bongo
You fight on a giant drum. Wear the Hover Boots while he is drumming so you do not get bounced around, and take them off when he stops. Watch the shadow of the free hand, dodge the slam and shoot the hand with an arrow, then do the same with the other hand. Use the Lenses of Truth to see his body, shoot the red eye as he charges and slash it while he is stunned. Repeat until he falls.
You receive the Shadow Medallion.
Gerudo Valley and Spirit Temple: Silver Gauntlets, Mirror Shield and Twinrova
- Age: Young Link and adult Link
- You need: Epona or the Longshot, Lenses of Truth, Requiem of Spirit
- You get: Gerudo Pass, Requiem of Spirit, Silver Gauntlets, Mirror Shield, Spirit Medallion
- Go to Gerudo Valley in the west of Hyrule Field and cross the broken bridge on Epona or with the Longshot.
- At Gerudo Fortress, let yourself get captured, then find and free the four carpenters so you can move around freely.
- Cross the Mirage Desert with the Longshot and the Lenses of Truth to reach the Evil Desert Colossus and the Spirit Temple. Sheik teaches you the Requiem of Spirit here.
- Return to the past and warp in with the Requiem of Spirit. In the temple, go up the stairs and left to meet Nabooru, agree to help her, and crawl through the child-sized hole next to her.
- Finish the left half of the temple as young Link for the Silver Gauntlets.
- Return as adult Link and use the Silver Gauntlets to open the right half. Get the Mirror Shield and use it to reflect sunlight onto the sun switches.
Boss: Twinrova
First Koume and Kotake circle you. Watch the sister with the magic circle in front of her, catch her beam with the Mirror Shield and redirect it at the other sister. Do this three times and they merge into Twinrova. Now catch three blasts of the same element in a row with the Mirror Shield: mixing fire and ice cancels the charge. Link fires it back and knocks her onto a platform, so rush over and attack. Repeat, watching which wand she shakes, because she starts to fake you out.
You receive the Spirit Medallion.
Ganon’s Castle: Light Arrows and the Final Stretch
- Age: Adult Link
- You need: All Medallions
- You get: Light Arrows, Golden Gauntlets
- With every Sage awakened, go to the Temple of Time. A cutscene plays and you receive the Light Arrows.
- Approach the lava moat around Ganon’s Castle. The Sages form a bridge. Just outside the castle, a Great Fairy offers a useful defensive upgrade.
- Inside, six routes branch off from a central hub. You can take them in nearly any order, but do the Shadow Barrier first: it gives you the Golden Gauntlets, which every other route needs.
- Before you climb the tower, finish any side quests you still want to do. The tower is a short gauntlet of battles up to Ganondorf, and from there it is a straight run to the credits.
Sources and Image Credits
Route details were cross-checked against the Switch 2 walkthroughs from Nintendo Life and TheGamer. Screenshots from our own playthrough are being added. The Legend of Zelda: Ocarina of Time and related visuals are property of Nintendo.
FAQ
What is the dungeon order in the Ocarina of Time remake?
As young Link you clear the Great Deku Tree, Dodongo Cavern and Lord Jabu-Jabu’s Belly. As adult Link you clear the Forest Temple, Fire Temple, Water Temple, Shadow Temple and Spirit Temple, and you finish in Ganon’s Castle.
Where is Din’s Fire in the Ocarina of Time remake?
At the Great Fairy near the top of Death Mountain. This is a change from the original. You need Din’s Fire to light the ring of torches at the start of the Shadow Temple, so pick it up before you go there.
Where do you get the Hookshot?
As adult Link, in the Kakariko Graveyard. Push the tombstone in the left row, drop into the hole and follow Dampé through the maze. The Hookshot is waiting at the end.
How do you get the Lenses of Truth?
Learn the Song of Storms in the Kakariko Windmill, return to the past and play it in the windmill as young Link. That drains the well, and you find the Lenses of Truth by clearing the Bottom of the Well.
Can you go back to young Link?
Yes, after you finish the Forest Temple. Place the Master Sword back in its pedestal in the Temple of Time to return to the past, and pull it again to go forward.
Where do you get the Golden Gauntlets?
In Ganon’s Castle, behind the Shadow Barrier. Do that route first, because the other routes need the Golden Gauntlets to finish their puzzles.