

Davy Jones’s Locker is a Bronze trophy in Assassin’s Creed Black Flag Resynced for swimming to the lowest point on the map. The destination is a broken Diving Bell on the floor of The Black Trench, but the final dark descent and limited air make it easy to turn around too early. This guide gives you the exact location, preparation and oxygen-safe route to the trigger.
Davy Jones’s Locker Quick Overview
| Trophy | Davy Jones’s Locker |
|---|---|
| Grade | Bronze |
| Requirement | Swim to the lowest point on the map. |
| Missable? | No. The dive remains available in free roam. |
| Required unlock | Diving Bell, obtained during Sequence 6 in Diving for Medicines. |
| Location | The Black Trench in the Castillo de Jagua sea, around coordinates (184-186, 424-425). |
| Time needed | About 5-10 minutes once the Diving Bell is installed. |
| Main risks | Running out of oxygen, taking the wrong gap and swimming into a shark’s path. |
Unlock the Diving Bell First
You cannot reach The Black Trench until the story introduces underwater exploration. Progress to Sequence 6 and complete the Diving Bell setup during the mission Diving for Medicines.
- Start the memory Diving for Medicines.
- Follow its harbour objective and obtain the Diving Bell.
- Make sure the Bell is installed on the Jackdaw before leaving.
- Enter with a full health bar.
- Learn how air barrels refill your oxygen.
- Use the unlimited oxygen setting if you want a stress-free route.
- No weapon or Jackdaw upgrade is required.
- You do not need to clear every collectible in the dive.
- The trophy can be collected after the story in free roam.
Accessibility note: Black Flag Resynced trophies are not tied to difficulty or accessibility settings. Unlimited oxygen is therefore a useful fallback if you only want the trophy trigger.
The Black Trench Location and Coordinates
Open the sea map and travel south of Havana into the Castillo de Jagua waters. Select The Black Trench diving site near coordinates (184-186, 424-425). Small differences come from where the cursor is placed on the icon; both references point to the same dive.
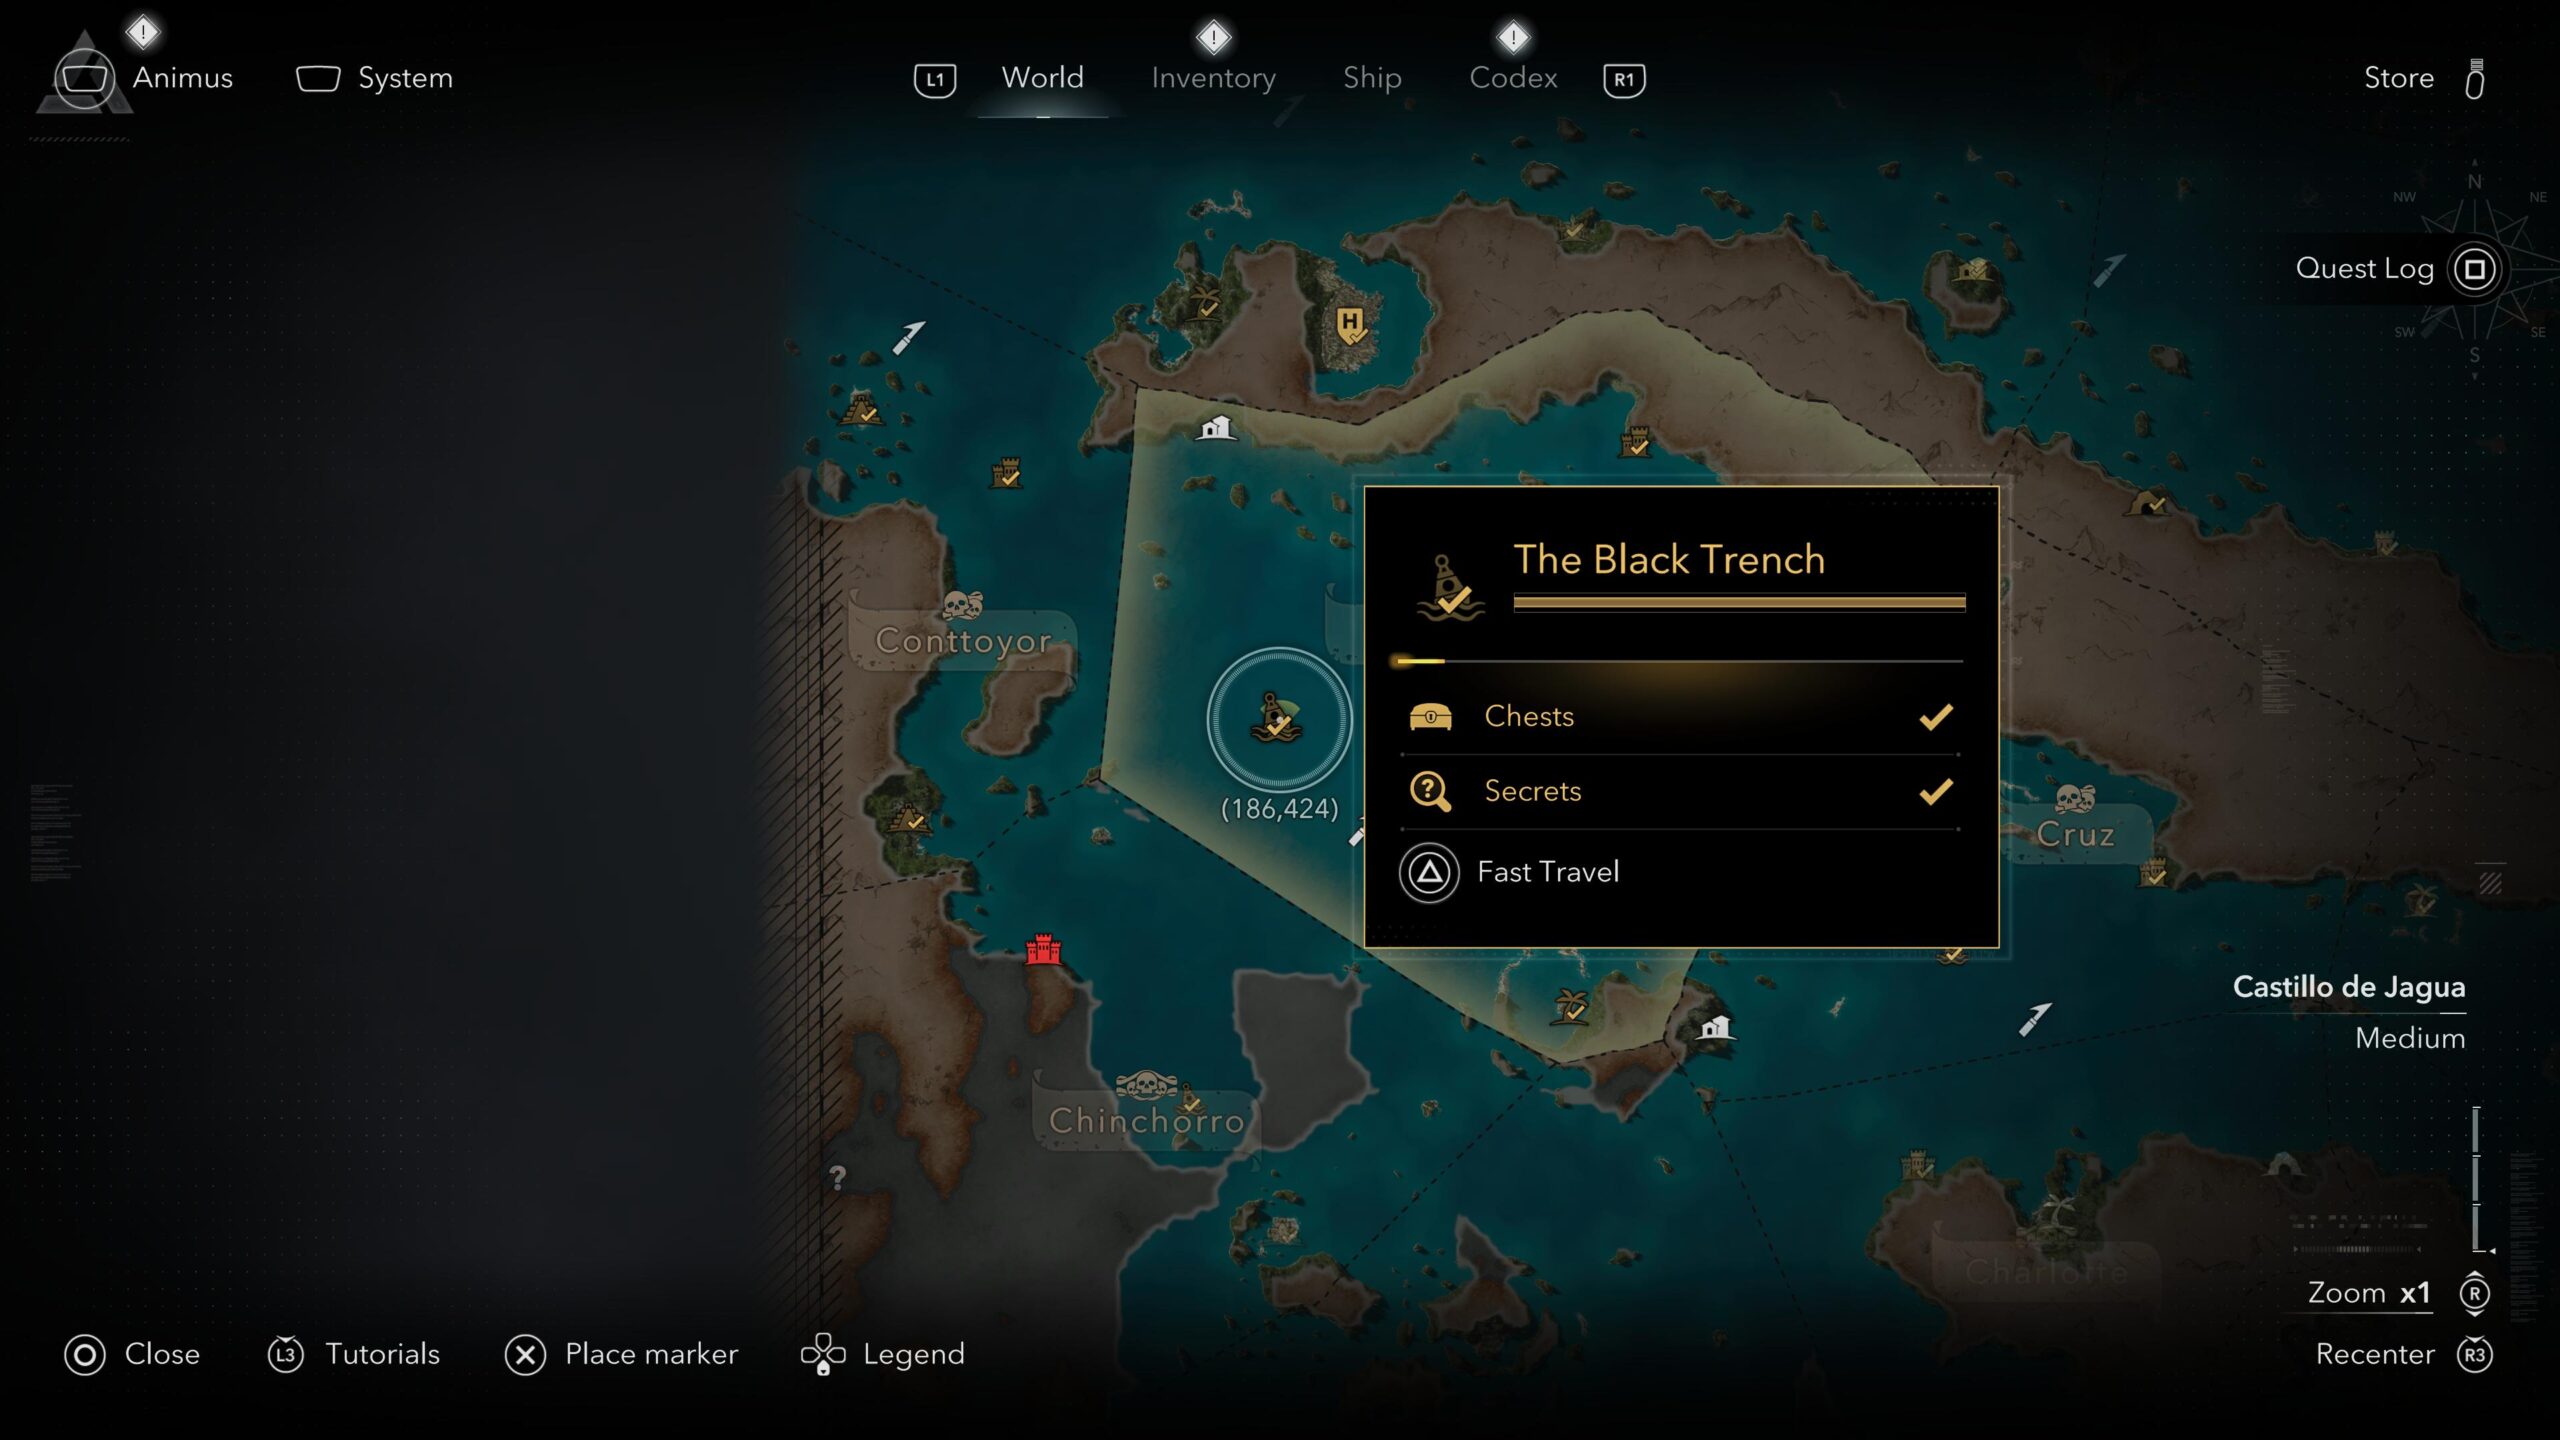
- Fastest approach: fast travel to the nearest synchronized viewpoint, then sail the Jackdaw to the diving marker.
- Correct site: the map label must read The Black Trench; nearby underwater sites do not contain the lowest-point trigger.
- Safe timing: you can make this dive immediately after unlocking the Diving Bell or return at any point in free roam.
Exact Route to the Lowest Point
The route trends west and downward from the main shipwreck. Treat the wreck, the last useful air barrel and the narrow rocky opening as your three navigation markers.
- Deploy the Diving Bell at The Black Trench. Once Edward enters the water, orient yourself toward the large shipwreck instead of dropping straight beneath the starting Bell.
- Wait for a safe shark opening. Use the wreckage and sea plants as cover. Let the shark pass before crossing open water rather than trying to outswim it.
- Follow the large wreck toward the west. Swim through or alongside the broken hull while continuing deeper. Jellyfish and the west compass heading help confirm that you are moving the correct way.
- Refill at the air barrel near the far end of the wreck. Top off even if your oxygen still looks comfortable. The final trench has very few recovery points.
- Leave the wreck and descend through the dark rocky gap. Keep heading west and down. Do not level out toward the brighter upper route.
- Continue to the trench floor. Pass the rocks and descend until the seabed stops falling away. Look for an old, broken Diving Bell with human remains nearby.
- Swim close to the broken Bell and scrape the bottom. Move slowly around the Bell and stay on the deepest seafloor for several seconds. The trophy should pop once the location trigger registers.
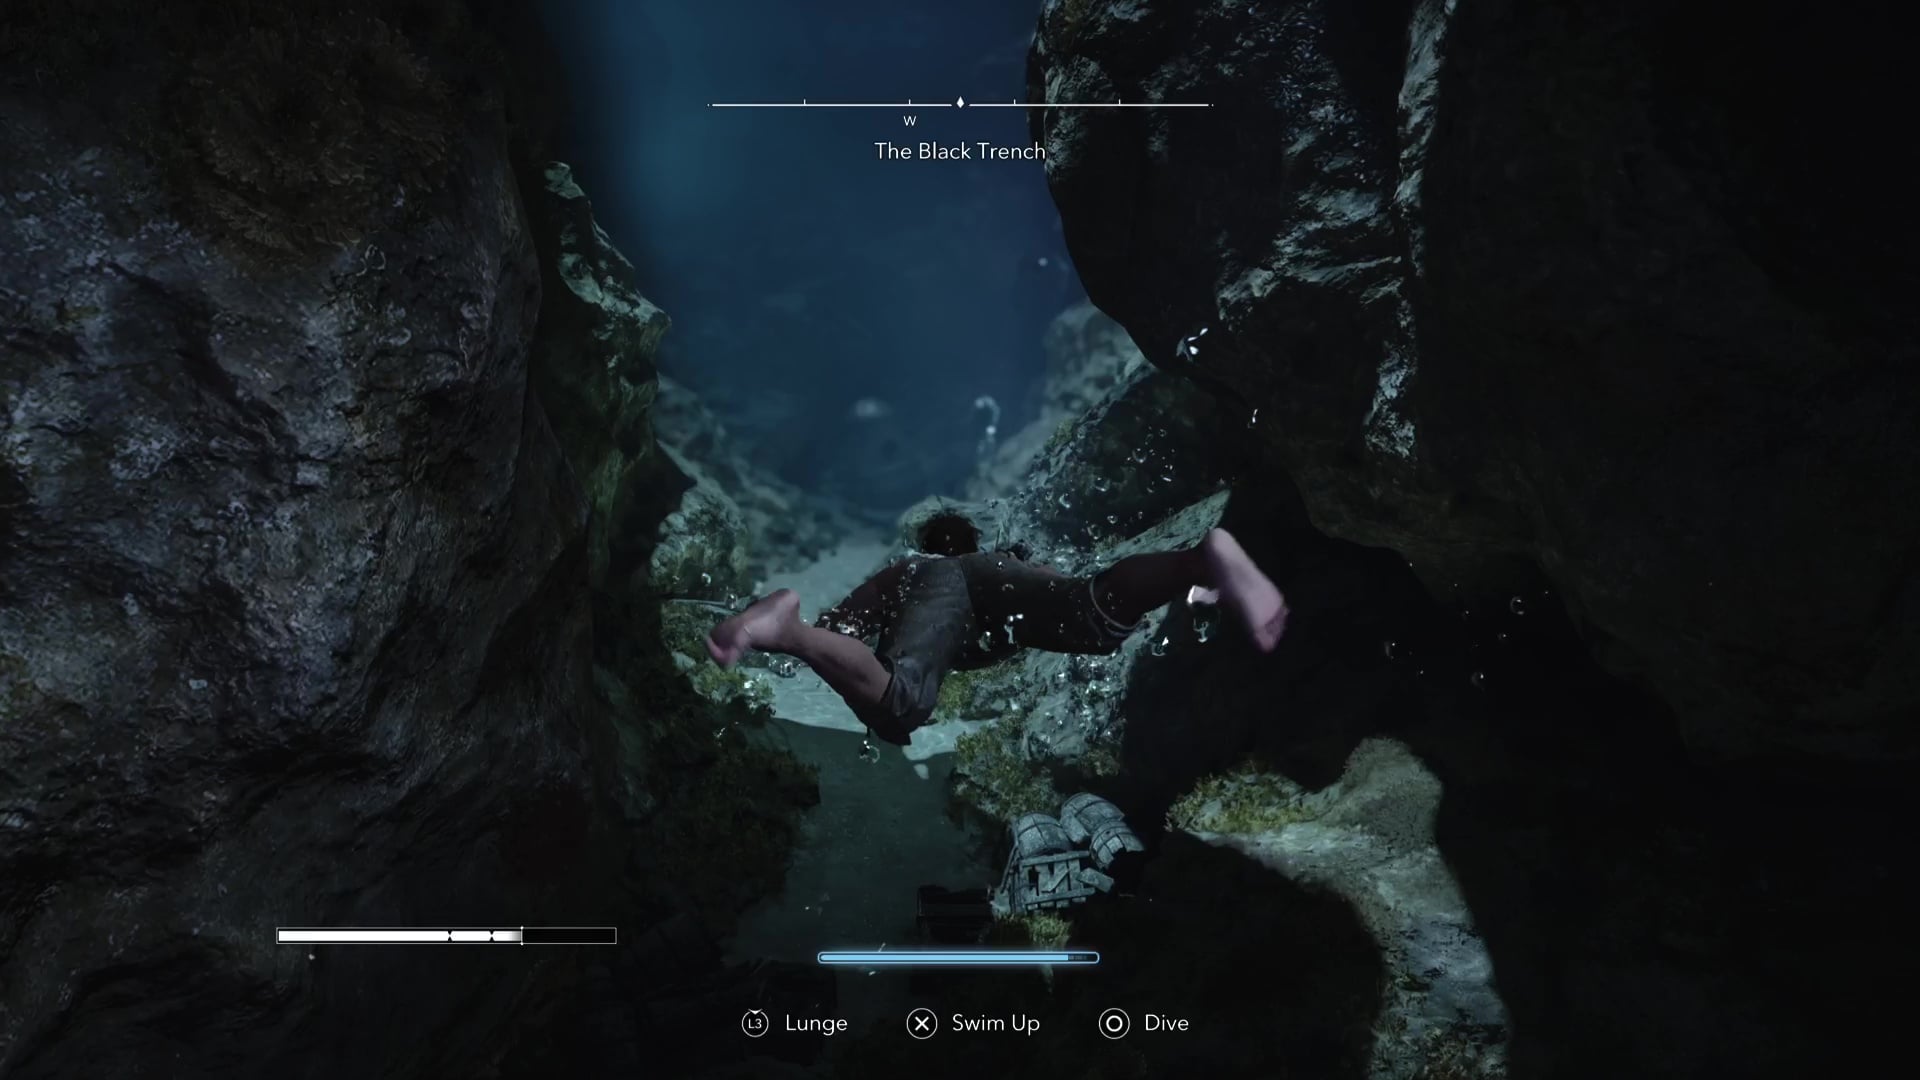
Do not turn back at the wreck. The wreck is only the midpoint. The actual lowest point is farther west, below the rocky passage, beside the ruined Diving Bell.
Where the Trophy Actually Unlocks
The destination is not a chest, Animus fragment or interaction prompt. It is an invisible location trigger around the ruined Diving Bell at the deepest part of the trench.
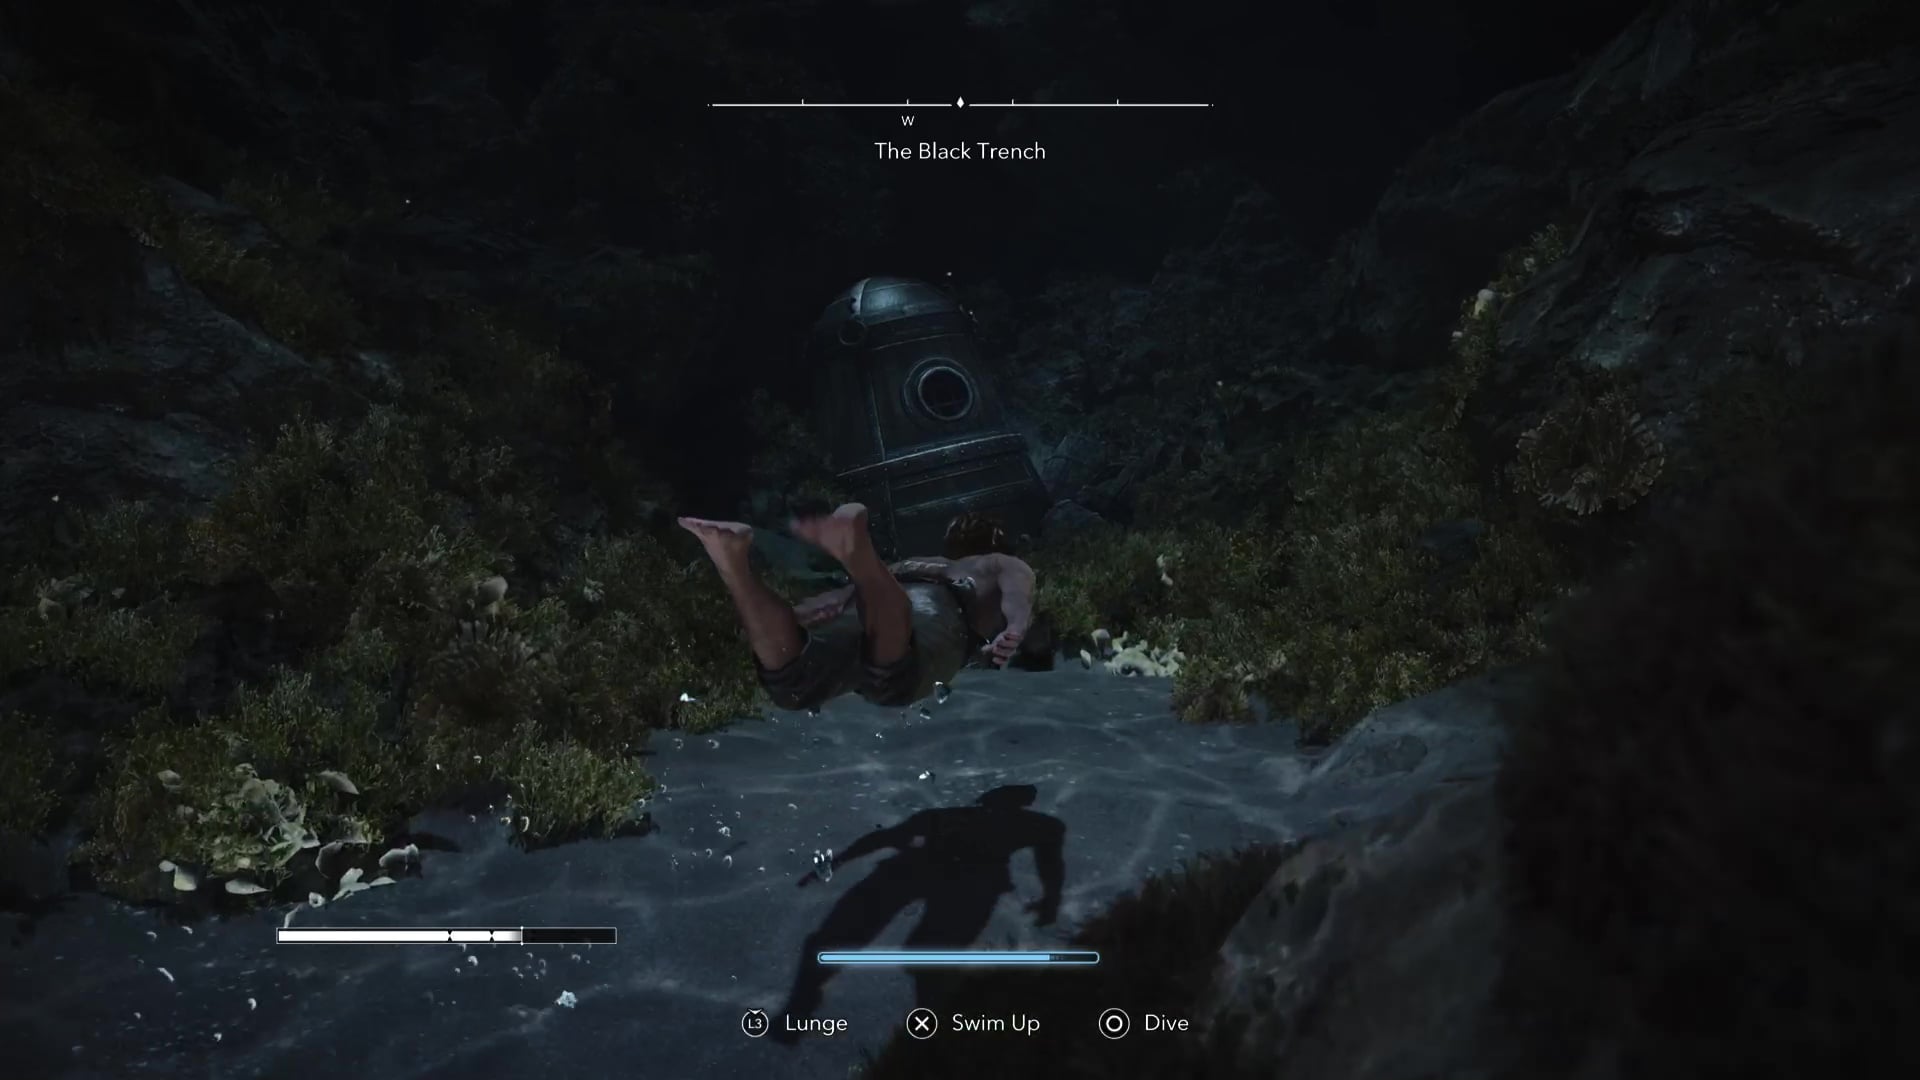
- Descend until Edward is almost touching the seabed.
- Swim directly beside and partly over the broken Diving Bell.
- Make one or two slow circles around it if the trophy does not pop immediately.
- Stay low; swimming several metres above the Bell may miss the trigger volume.
- There is no button prompt, so watch for the platform trophy notification.
Oxygen and Shark Survival Tips
You do not need to fight anything. A patient line through the wreck is safer and usually faster than rushing across open water.
- Use the air barrel at the far side of the main wreck.
- Wait until the oxygen meter is full before leaving it.
- Do not spend time looting during the trophy run.
- Pause behind wreckage while the shark patrols past.
- Cross open sections only when its back is turned.
- Keep sea plants or solid debris between you and the shark.
- Use the compass instead of the darkness for direction.
- The large wreck is the midpoint, not the destination.
- The broken Diving Bell sits on the final trench floor.
After the trophy unlocks, return toward the wreck and reuse the air barrels, or finish the normal diving-site exit. With unlimited oxygen enabled, you can retrace the route without managing the meter.
Davy Jones’s Locker Troubleshooting
The trigger can feel slightly delayed. Before restarting the dive, check your height and position around the broken Bell.
| Problem | Likely Cause | Fix |
|---|---|---|
| The trophy does not pop at the Bell | Edward is too high or just outside the trigger | Touch the seafloor and swim slowly around both sides of the ruined Bell for several seconds. |
| You cannot find the broken Diving Bell | You stopped at the large shipwreck | Refill there, then continue west and descend through the dark rocky opening. |
| Oxygen runs out on the final descent | The last air barrel was skipped or left too early | Return to the barrel near the wreck, fill the meter completely, or enable unlimited oxygen. |
| A shark keeps detecting you | You are crossing open water in its patrol line | Wait behind wreckage, then cross after the shark turns away. |
| The Black Trench cannot be selected | The Diving Bell has not been unlocked and installed | Progress through Sequence 6 and complete the Diving Bell setup in Diving for Medicines. |
| The coordinates look slightly different | The map cursor is on another part of the same icon | Use The Black Trench label; references around (184-186, 424-425) all identify this site. |
Fast Trophy Checklist
- Reach Sequence 6 and obtain the Diving Bell.
- Sail to The Black Trench around (184-186, 424-425).
- Follow the large shipwreck west and downward.
- Refill oxygen at the barrel near the end of the wreck.
- Descend west through the dark rocky opening.
- Reach the broken Diving Bell on the trench floor.
- Swim low around the Bell until the trophy pops.
- Return by the same air-barrel route or finish the dive.
Sources and Image Credits
The Black Trench location, final Diving Bell trigger and route images were verified with VGC’s Davy Jones’s Locker guide. Sequence requirements, oxygen routing and trigger behavior were cross-checked with the Mobalytics route guide, the GamesHub lowest-point guide and the PowerPyx trophy roadmap. Screenshots are Ubisoft images sourced via VGC.
Davy Jones’s Locker FAQ
Where is the lowest point in Black Flag Resynced?
The lowest point is beside a broken Diving Bell at the bottom of The Black Trench, south of Havana in the Castillo de Jagua sea.
What are The Black Trench coordinates?
The diving-site marker is around (184-186, 424-425). The exact number changes slightly depending on where the cursor rests on the icon.
When can I unlock Davy Jones’s Locker?
You can attempt it after obtaining and installing the Diving Bell during Sequence 6 in Diving for Medicines.
Is Davy Jones’s Locker missable?
No. The Black Trench remains accessible in free roam, including after completing the story.
Can I use unlimited oxygen for the trophy?
Yes. Trophies are not locked by difficulty or accessibility settings in Black Flag Resynced, so unlimited oxygen can make the descent easier.
Why did the trophy not unlock at the broken Diving Bell?
The location trigger is close to the seabed. Swim directly beside the Bell, touch the trench floor and make a slow circle around it until the notification appears.